Expert DStv Explora Installation and Setup Services
The DStv Explora is one of the most advanced decoders available in South Africa, delivering powerful recording, streaming, and live TV control in a single device. However, even the best decoder will underperform without a professional DStv Explora installation. Signal quality, dish alignment, Smart LNB configuration, and correct cabling are all critical factors that determine whether you enjoy crystal-clear viewing or frustrating error codes. At Sat Digital, our experienced technicians deliver reliable, high-quality DStv Explora installation services across Cape Town and the Western Cape – giving you the setup you need to get the most from your investment.
Call 071 304 6955 Now to Book Your DStv Explora Installation!
What Is a DStv Explora?
The DStv Explora is DStv’s flagship PVR (Personal Video Recorder) decoder line, combining satellite signal reception, digital video recording, live TV control, and on-demand services into one powerful unit.
Here is what makes the Explora stand out from other DStv decoders:
- Generous Recording Capacity: The Explora 3A/3B offers up to 110 hours of recording on internal storage, while the newer 2 TB model delivers approximately 220 hours of HD content – enough for around 150 series episodes or 100 movies.
- Live TV Control: Pause live TV for up to two hours, rewind, fast-forward, and use instant replay. Series recording automatically captures every episode of your favourite shows.
- Catch Up & BoxOffice: Watch catch-up content from the past few days and rent BoxOffice movies on demand. Advanced features like Catch Up Plus require an active internet connection.
- HD & Streaming Integration: Explora models support HD formats (720p, 1080i), while the Explora Ultra adds 4K UHD resolution, Dolby Atmos sound, and built-in WiFi with access to streaming apps like Showmax, Netflix, Disney+, Prime Video, and YouTube.
- Parental Control: Built-in parental control features let you manage what your household watches, keeping content safe for younger viewers.
- Multi-Room Viewing: Through Extra View (XtraView), you can link multiple decoders under one subscription so every TV in your home gets access to DStv content.
Whether you want to record your favourite SuperSport matches, binge a full series, or stream Netflix in 4K, the DStv Explora delivers a premium viewing experience – provided it is professionally installed.
Benefits of Professional DStv Explora Installation
Installing a DStv Explora decoder requires specific equipment, precise configuration, and technical expertise. Here is why professional installation matters:
- Correct Setup From Day One: A DStv Accredited Installer is recommended for optimal installation performance. Professionals follow manufacturer recommendations for dish alignment, Smart LNB configuration, and cabling – eliminating guesswork. Note: following the correct alignment and configuration steps from the start helps prevent avoidable setup issues.
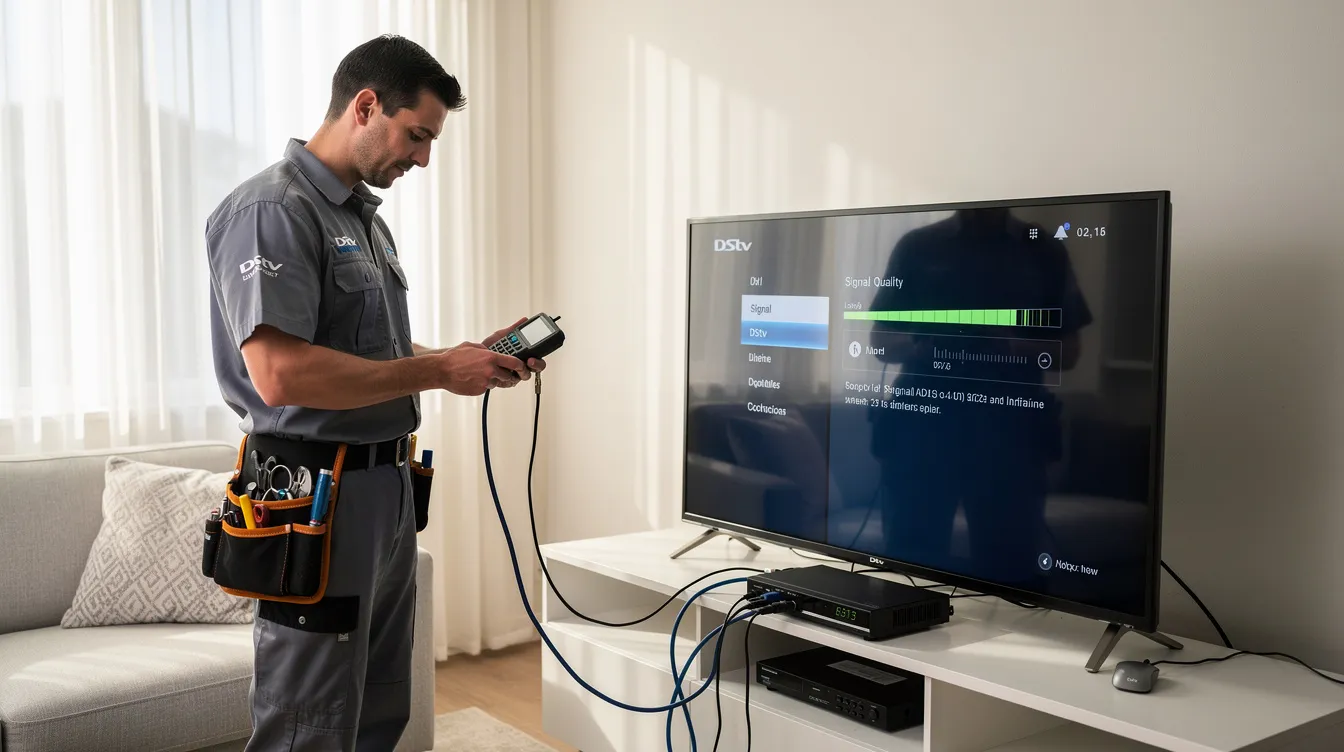
- Reliable Signal Quality: Signal quality improves with proper dish alignment at 68.5E. Professionals use a satellite signal finder or meter to locate the satellite signal accurately and achieve 80–90% signal strength.
- Fewer Future Problems: Maintaining high-quality installation includes using quality connectors and cables. This reduces the risk of signal loss, error codes, and costly repeat service calls.
- Better Viewing Experience: From HD picture quality to uninterrupted streaming, a professional setup ensures every feature of your Explora works as intended.
- Expert Troubleshooting: Experienced technicians can identify and resolve issues on site, from signal interference to decoder communication errors, before they become ongoing headaches.
- Warranty Protection: Non-accredited work can void your equipment warranty. Choosing a professional installer protects your investment with proper workmanship guarantees.
When you choose Sat Digital for your DStv Explora installation, you get a setup that is done right the first time – saving you time, money, and frustration down the line.
Our DStv Explora Installation Services
Residential DStv Explora Installation
We handle every type of home installation, whether you are setting up a brand-new system or upgrading from an older decoder:
- New DStv Explora installations for houses and apartments
- Replacement installations and decoder upgrades from standard HD decoders
- Full system configuration including satellite dish, Smart LNB, and cabling
- Multi-room viewing solutions with Extra View for households with multiple TVs
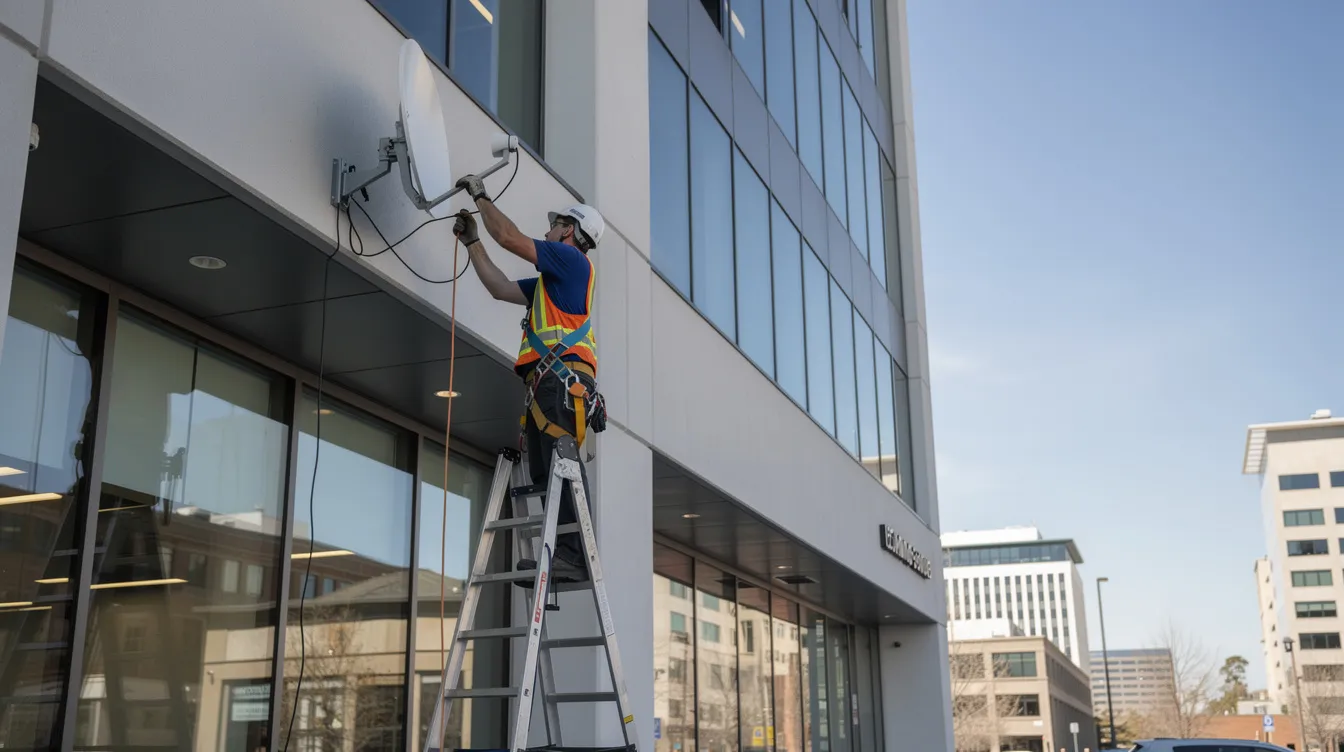
Commercial DStv Explora Installation
Businesses need reliable, large-scale installations that perform day in and day out. We provide:
- Professional installations for offices, hotels, and guest houses
- Restaurant and sports bar setups with multiple decoders and high channel counts
- Waiting room installations for medical practices and service centres
- Large-scale commercial configurations using optical LNBs and multiswitches for signal distribution across many rooms
Whether your property has one TV or fifty, we plan and install the right system for your needs.
Our Premium DStv Explora Models
Choosing the right decoder depends on your viewing habits, home setup, and budget. Here are the main Explora models and variants we install:
- DStv Explora 1: The original Explora PVR with recording, pause, and rewind functionality. A solid entry-level option for basic PVR needs.
- DStv Explora 2: Enhanced version with improved processing and additional features. Suitable for households wanting reliable recording and Catch Up access.
- DStv Explora 3 (Model 3A): Offers up to 110 hours of recording, HD resolution support, and compatibility with Smart LNB technology. A popular choice for most homes.
- DStv Explora 3 (Model 3B): Refined version of the 3A with improved efficiency and performance. Works seamlessly with the DStv Smart LNB for full feature access.
- DStv Explora 2 TB: The “beefed-up” model with 2 TB storage, delivering approximately 220 hours of HD recording – ideal for large families who record extensively.
- DStv Explora Ultra: The most advanced model in the range. Features 4K UHD, Dolby Atmos, built-in WiFi, and access to Netflix, Showmax, Disney+, Prime Video, and YouTube. Requires a Smart LNB and 80 cm dish for installation.
Each model has specific installation requirements. Our technicians assess your needs and recommend the right Explora for your home or business.
Our DStv Explora Installation Process
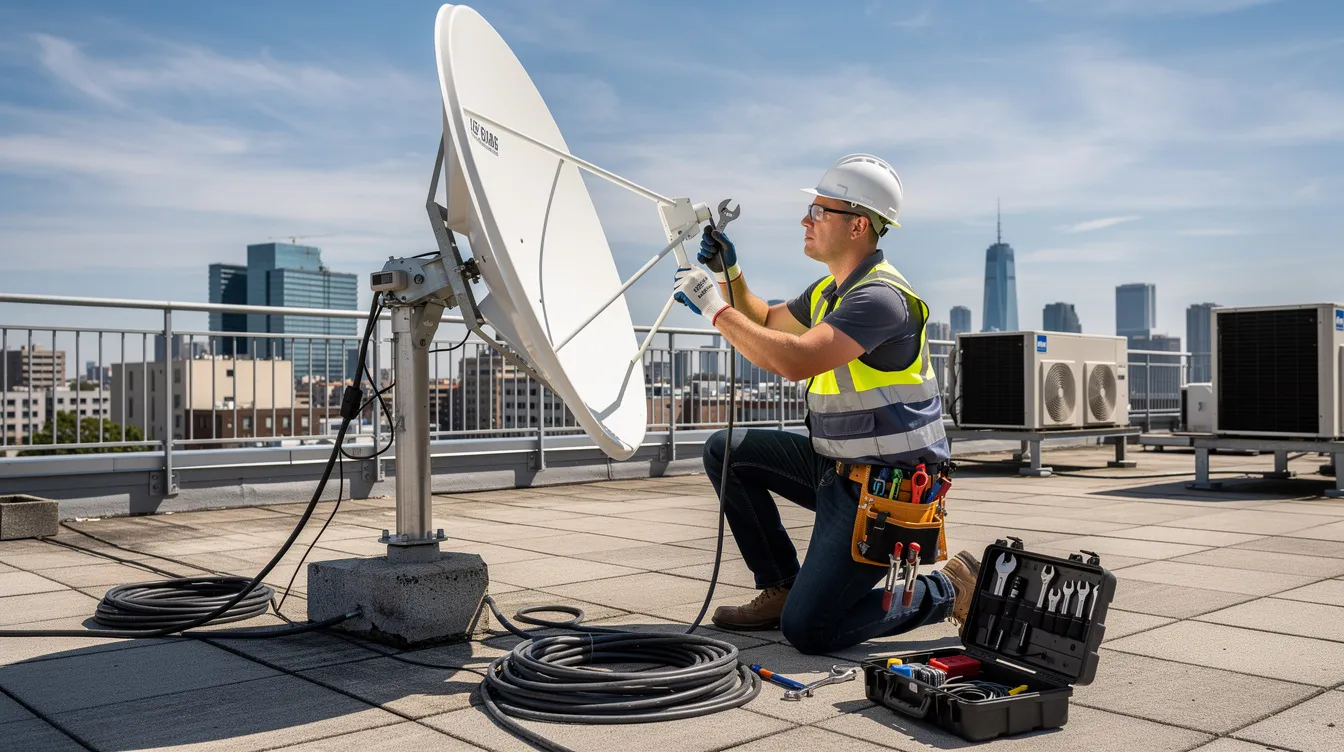
Step 1: Satellite Dish Site Assessment and Planning
Every professional DStv Explora installation begins with a thorough site assessment. Our technicians check your location for a clear line of sight to the satellite, evaluate signal strength, and determine the optimal position for your satellite dish. We assess whether an 80 cm dish is sufficient or whether terrain, obstructions, or altitude require a larger dish. We also evaluate equipment requirements – including Smart LNB model, coaxial cable runs, and, in addition, any extra hardware needed for Extra View setups.
Step 2: Professional Installation
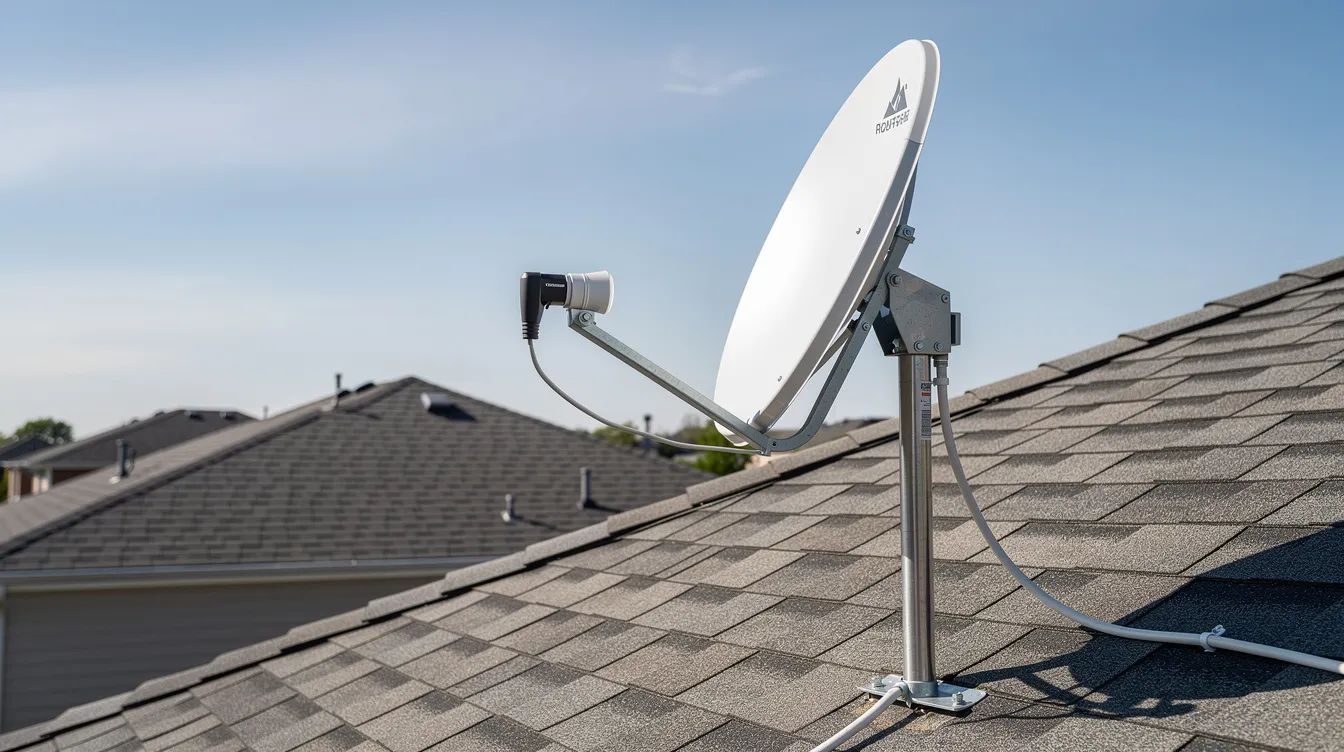
With the plan in place, we mount the satellite dish securely on your wall or roof using the correct bracket. We install the DStv Smart LNB and align the satellite dish to 68.5E for DStv services, adjusting azimuth, elevation, and LNB skew for optimal reception. We connect RG6 coaxial cable to the Unicable port of the Smart LNB, ensuring secure termination with F-type connectors at both ends. The coaxial cable should be securely terminated at both ends for best performance. Using RG6 coaxial cable is recommended for DStv installations, as it provides superior shielding and signal integrity compared to lower-grade alternatives.
Step 3: Testing and Configuration
After physical installation, we run the installation wizard after connecting the decoder. We test signal strength and quality, aiming for 80–90% across all channels. We perform a full channel scan and verify that all subscribed channels are working. An HDMI cable is necessary for HD video and audio output from the decoder, so we connect and configure your TV output. For Explora Ultra models, we set up internet connectivity via Ethernet or the built-in WiFi for streaming apps and Catch Up services. The decoder must be activated to view channels after installation.
Step 4: Customer Training and Support
Once everything is working, we walk you through your new system. We demonstrate remote usage, how to record shows, pause live TV, access BoxOffice movies, and log into streaming apps. We provide maintenance guidelines including periodic checks of dish alignment, cable condition, and LNB protection. Our installations come with a workmanship guarantee, and we remain available for ongoing technical support.
DStv Explora Ultra Installation
The DStv Explora Ultra represents the pinnacle of DStv’s decoder lineup. The DStv Explora Ultra was launched in January 2021, bringing together traditional satellite TV and modern streaming in one device.
Key Features of the Explora Ultra:
- 4K UHD Resolution: Watch supported content in stunning 4K quality – a significant upgrade over the HD output of older Explora models.
- Dolby Atmos Sound: Immersive audio that brings movies, sport, and series to life.
- Built-In WiFi: Connect to your home internet without additional hardware for seamless access to streaming apps.
- Streaming Apps: Access Netflix, Showmax, Disney+, Prime Video, and YouTube directly from the decoder – no need for separate streaming devices.
- Full PVR Functionality: All the recording, pause, rewind, and Catch Up features you expect from an Explora, plus on-demand BoxOffice movies.
Installation Requirements:
A Smart LNB and 80 cm dish are required for installation of the Explora Ultra. Without a Smart LNB, many advanced features – including streaming apps, remote access, and Extra View via UniCable ports – may not work. For shared dish or complex building setups, our technicians assess whether a multiswitch or optical LNB is needed to deliver reliable signal to every decoder.
The Explora Ultra launched at approximately R2,499 standalone and around R3,699 including installation, with a standard 12-month equipment warranty.
If you want the most advanced DStv experience available, Explora Ultra installation by Sat Digital ensures every feature works perfectly from day one. Call us on 071 304 6955 to find out more.
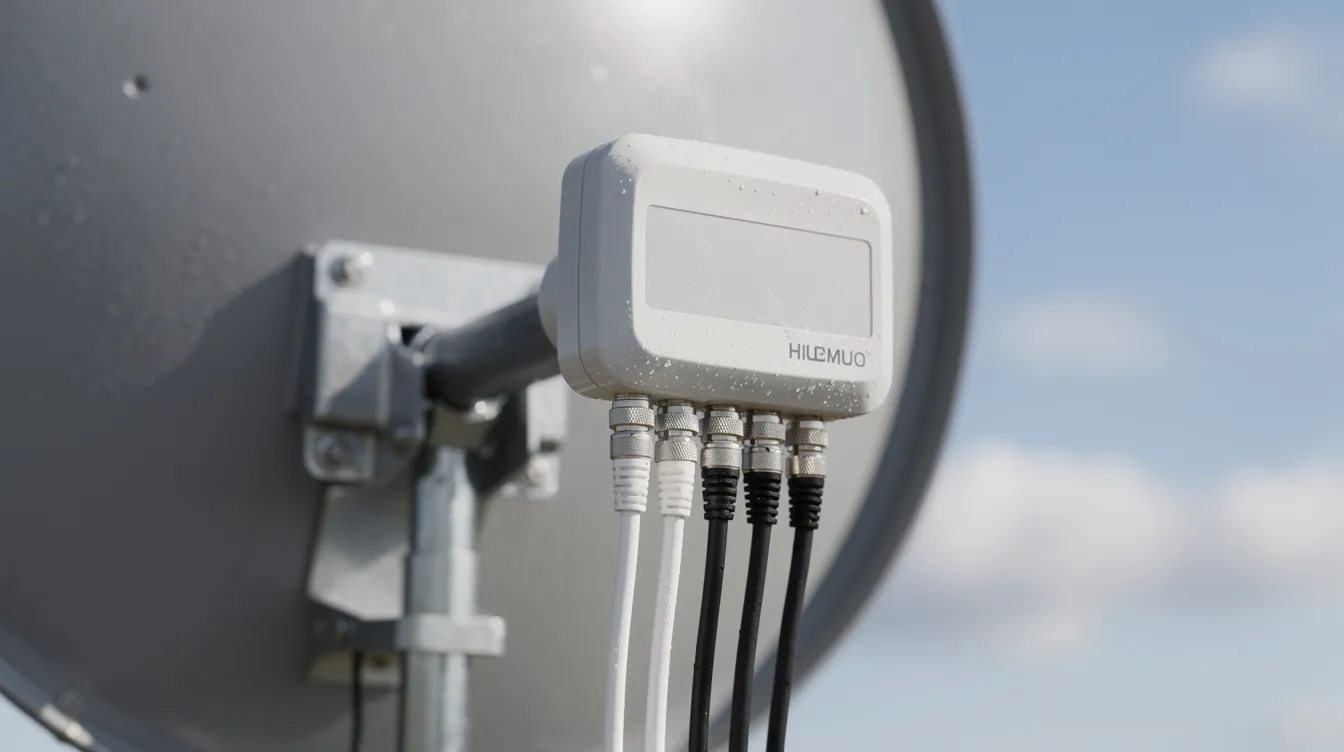
DStv Smart LNB Installation & Configuration
A Smart LNB is required for DStv Explora signal compatibility. Understanding why this component matters is essential for any Explora owner.
What Does a Smart LNB Do?
The DStv Smart LNB (Low Noise Block converter) replaces the traditional DStv Switch for most modern installations. It integrates the functions of a multiswitch and UniCable technology, allowing each decoder to receive its own frequency band through a single coaxial cable. This simplifies cabling, reduces installation costs, and enables advanced features like streaming, Catch Up, and Extra View without external switches.
Smart LNB Models:
DStv offers the LMX500 and the newer LMX501 models. The LMX501 increases the number of userbands – up to approximately 30 – making it more efficient for multi-decoder setups.
Smart LNB vs Universal LNB:
Older universal LNBs (twin LNB, quad LNB) have multiple outputs but lack the return path and userband technology of the Smart LNB. While a twin LNB or quad LNB might work for basic setups with older decoders, they often require complex additional cabling for Extra View and do not support the full feature set of modern Explora models. For future-proofed installations, the DStv Smart LNB is the clear choice.
Why Professional Installation Matters:
Incorrect LNB installation is one of the most common causes of signal problems. Our technicians ensure the Smart LNB is properly mounted, aligned, and connected using RG6 coaxial cable with secure F-type connectors – delivering reliable signal performance for years to come.
If using a communal dish, a DStv Smart Switch may be needed to convert signals for distribution to multiple units.
Extra View Installation & Setup
XtraView allows multiple DStv decoders for shared viewing under one subscription – so every TV in your home can access DStv content independently.
How Extra View Works:
Your primary decoder holds the subscription and sends a “heartbeat” signal to secondary decoders approximately every 90 seconds. If the heartbeat fails, secondary decoders display the E143-4 error (“waiting for communication from primary”). With Smart LNBs, the heartbeat is carried over the coaxial cable – no separate heartbeat cable is needed. Older setups may require a physical cable between decoder RF ports.
Installation Requirements:
- An 80 cm dish kit is required for XtraView installations
- A Smart LNB is necessary for XtraView setups
- Use RG6 coaxial cable for XtraView connections
- XtraView requires a signal splitter for multiple decoders
- Each secondary decoder connects via a UniCable port on the Smart LNB
Professional Configuration:
Setting up Extra View correctly requires precise port assignment and decoder linking through your DStv account. Our technicians configure each decoder, verify heartbeat communication, and test all linked devices before completing the installation. This prevents the frustrating E143-4 errors that plague DIY Extra View setups.
Whether you have two TVs or five, Sat Digital delivers seamless multi-room viewing through professional Extra View installation.
Common DStv Explora Problems We Fix
Even well-installed systems can develop issues over time. Here are the most common DStv Explora problems we diagnose and resolve:
No Signal Error (E48-32)
DStv error E48-32 indicates no signal received. This is the most frequently reported Explora error. Common causes include rain fade, faulty coaxial cable, improper dish alignment, a damaged LNB, or loose F-type connectors. Realigning the dish can resolve signal issues in many cases. Our technicians perform signal strength tests, inspect cable integrity, replace damaged components, and realign the dish to 68.5E.
Extra View Communication Error (E143-4)
This error means the secondary decoder cannot receive the heartbeat signal from the primary decoder. Causes include bad cables, incorrect LNB port assignment, or a missing Smart LNB. We trace the issue, reconfigure ports, and restore communication between linked decoders.
Signal Loss and Quality Issues
Pixelation, picture dropouts, and interrupted sound are often caused by moisture in coaxial cables, loose connectors, dish misalignment after storms or wind, or physical obstructions like trees and buildings. We identify the root cause and implement lasting repairs.
Boot and Software Errors
A decoder stuck on the boot screen may have a failing hard drive or corrupted firmware. Repair typically involves firmware reflashing or internal drive replacement. Repair costs in South Africa generally range from R350 to R1,200 depending on severity.
Smart LNB Communication Problems
If the Smart LNB is not functioning correctly, features like Catch Up, streaming, and Extra View may fail. We test the LNB, replace it if necessary, and ensure proper connection to each decoder.
Dish Alignment and Positioning Problems
Strong winds, structural settling, or accidental impact can shift your satellite dish out of alignment. We use professional signal meters to restore precise alignment, ensuring stable reception.
Do not wait for small problems to become big ones. Call Sat Digital on 071 304 6955 for fast, professional repairs.
Same-Day DStv Explora Installation
We understand that when your DStv is down, every hour feels like a long wait. That is why Sat Digital offers same-day DStv Explora installation and repair services across Cape Town and the Western Cape.
- Fast Response Times: We aim to reach you on the same day you call, subject to availability and location.
- Emergency Assistance: Whether it is a signal outage before a big match or a decoder failure, we treat your issue with urgency.
- Flexible Scheduling: Morning, afternoon, or weekend appointments – we work around your schedule.
- Professional Workmanship Guarantees: Every installation and repair comes with our workmanship guarantee, giving you confidence that the job is done right.
Time is valuable. Do not spend days without your DStv. Contact us at info@satdigital.co.za or call 071 304 6955 for quick problem resolution.
Areas We Service
Sat Digital provides professional DStv Explora installation services throughout Cape Town and the broader Western Cape. Our service areas include:
- Northern Suburbs: Bellville, Durbanville, Brackenfell, Kraaifontein, Goodwood, Parow
- Southern Suburbs: Claremont, Constantia, Wynberg, Tokai, Fish Hoek, Muizenberg
- Atlantic Seaboard: Sea Point, Camps Bay, Green Point, Mouille Point
- West Coast: Milnerton, Century City, Table View, Parklands, Bloubergstrand
- Winelands & Helderberg: Somerset West, Stellenbosch, Strand, Gordon’s Bay
- Greater Cape Town: Paarl, Franschhoek, Malmesbury, and surrounding regions
Cape Town generally enjoys strong DStv signal coverage, but certain mountainous suburbs, coastal areas, and regions prone to heavy storms may experience signal challenges. Our technicians know the local conditions and adapt every installation accordingly – whether that means selecting a larger dish, reinforcing mounting, or choosing optimal cable routes.
No matter where you are in the Western Cape, Sat Digital is ready to install, upgrade, or repair your DStv Explora system.
Customer Testimonials
“We had three TVs and wanted Extra View on all of them. Sat Digital set everything up in one visit – Smart LNB, cabling, and decoder linking. Not a single issue since. Highly recommended!”
– Pieter V., Durbanville
“Our guest house needed a reliable DStv setup across 12 rooms. The Sat Digital team planned the whole system, installed optical LNBs and multiswitches, and had everything working perfectly within a day. Our guests love the service.”
– Mariam S., Stellenbosch
“I upgraded to the Explora Ultra and needed a new Smart LNB. The technician arrived the same morning I called, installed everything, and even helped me set up Netflix and Showmax. Brilliant service.”
– James K., Table View
Why Choose Sat Digital for DStv Explora Installation
When you choose Sat Digital, you are choosing a team that takes every installation seriously. Here is what sets us apart:
- Experienced & Certified Technicians: Our installers are trained on the latest DStv products, Smart LNB technology, and Explora Ultra configurations. We follow MultiChoice best practices for every job.
- Professional Workmanship Standards: We use RG6 quad-shielded coaxial cable, quality F-type connectors, and properly rated HDMI cable for every installation. No shortcuts, no cheap materials.
- Reliable Ongoing Support: If something goes wrong after your installation, we are a phone call away. Our workmanship guarantee means we stand behind every job.
- Fast Response Times: Same-day service is available across Cape Town and surrounding areas. We respect your time and keep appointments.
- High-Quality Installations With Warranty Coverage: Explora models come with a standard 12-month equipment warranty. Our workmanship carries its own guarantee, giving you peace of mind.
- Transparent Pricing: No hidden fees. We provide clear quotes before any work begins, whether it is a simple decoder setup or a full commercial installation.
Your DStv experience is only as good as your installation. Choose Sat Digital to get it right.
Frequently Asked Questions
How long does a DStv Explora installation take?
A standard residential DStv Explora installation typically takes between 1 and 2 hours. This includes mounting the satellite dish, installing the Smart LNB, running coaxial cable, connecting the decoder, and performing signal testing. More complex setups – such as multi-room Extra View configurations or commercial installations – may take longer depending on the number of decoders and cable runs required.
Can you install DStv Explora Ultra decoders?
Absolutely. We install and configure the DStv Explora Ultra, including Smart LNB setup, 4K resolution configuration, Dolby Atmos audio, and streaming app access for Netflix, Showmax, Disney+, and more. A Smart LNB and 80 cm dish are required for Explora Ultra installation.
Do I need a Smart LNB for my DStv Explora?
Yes. A Smart LNB is required for DStv Explora signal compatibility. Without it, critical features such as Catch Up, streaming apps, and Extra View via UniCable ports will not function. If your current setup uses an older universal LNB (twin LNB or quad LNB), we can upgrade it to a DStv Smart LNB during your installation.
Can you set up Extra View for multiple TVs?
Yes. XtraView allows multiple DStv decoders for shared viewing under one subscription. We handle full Extra View configuration, including Smart LNB port assignment, signal splitting, heartbeat verification, and decoder linking. An 80 cm dish kit and Smart LNB are required for XtraView installations.
Can you fix DStv Explora signal problems?
We resolve all common signal issues, including E48-32 (no signal), E143-4 (Extra View heartbeat failure), pixelation, and signal dropouts. Realigning the dish can resolve signal issues in many cases, and we also inspect and replace faulty cables, connectors, and LNBs as needed.
Can you upgrade my current decoder to a DStv Explora?
Yes. We upgrade existing setups from standard HD decoders or older Explora models to the latest Explora or Explora Ultra. This may include replacing your LNB, upgrading cabling, and reconfiguring your satellite dish.
Do you provide same-day DStv Explora installations?
We offer same-day installation and repair services across Cape Town and the Western Cape, subject to availability. Contact us early in the day for the best chance of same-day service.
Can you install DStv Explora at businesses?
Yes. We specialise in commercial DStv Explora installations for offices, hotels, guest houses, restaurants, sports bars, and waiting rooms. As reported by BusinessTech, businesses increasingly rely on premium DStv setups to attract and retain customers. We design and install systems of any scale, including multi-decoder setups with optical LNBs and multiswitches.
What causes DStv signal problems?
Signal problems can result from dish misalignment, damaged or low-quality coaxial cable, corroded F-type connectors, failing LNBs, physical obstructions (trees, buildings), and severe weather (rain fade). A satellite signal finder or meter is essential for locating the satellite signal accurately during installation and troubleshooting.
Why should I use a professional DStv installer?
Professional installation ensures correct dish alignment to 68.5E, proper Smart LNB configuration, high-quality cabling with RG6 coaxial cable and secure F-type connectors, and full decoder activation and testing. DIY installations risk voiding your warranty, causing signal problems, and requiring costly repairs. According to TechCentral, accredited installation remains the most reliable path to a trouble-free DStv experience.
What equipment is included in a DStv Explora installation?
A standard installation includes the DStv Explora decoder, an 80 cm satellite dish, a DStv Smart LNB, RG6 coaxial cable, F-type connectors, and an HDMI cable for connecting to your TV. Depending on your setup, additional cabling, signal splitters, or a Smart Switch may also be required.
How do I access Catch Up and streaming on my Explora?
Access to DStv Catch Up and streaming apps requires an active internet connection. On the Explora Ultra, simply connect via the built-in WiFi or Ethernet cable and log into your preferred apps. On older Explora models, you may need a DStv WiFi Connector. Our technicians configure internet connectivity as part of every installation.
Get Professional DStv Explora Installation Today
Your DStv Explora is designed to deliver an exceptional viewing experience – but only when it is installed correctly. From satellite dish alignment and Smart LNB configuration to Extra View setup and streaming app access, every detail matters. Poor installation leads to signal problems, error codes, and wasted money on repeat repairs.
Sat Digital brings the expertise, equipment, and commitment to quality that your installation deserves. We serve homeowners, businesses, and property managers across Cape Town and the Western Cape with fast, reliable, and professional DStv installation services.
Whether you need a brand-new DStv Explora installation, an upgrade to the Explora Ultra, or a repair for an existing system, we are ready to help.
As highlighted by MyBroadband, the shift towards integrated satellite and streaming setups makes professional installation more important than ever. Resources from HomeImprovement4U and retailers like Incredible also emphasise that accredited installation is key to long-term decoder performance.
Additionally, platforms like OpenView offer alternative free-to-air options, but for the full DStv experience – HD recording, 4K streaming, Dolby Atmos, and multi-room viewing – nothing matches a properly installed DStv Explora system.
Contact Sat Digital for Expert Installation
Ready to enjoy the best DStv experience? Get in touch with Sat Digital today for professional DStv Explora installation, upgrades, and repairs.
Phone: 071 304 6955
Email: info@satdigital.co.za
Website: www.satdigital.co.za
We service Cape Town, the Northern Suburbs, Southern Suburbs, Atlantic Seaboard, West Coast, Somerset West, Stellenbosch, Bellville, Durbanville, Brackenfell, and all surrounding areas.
Call 071 304 6955 now—your perfect DStv Explora installation is one phone call away.