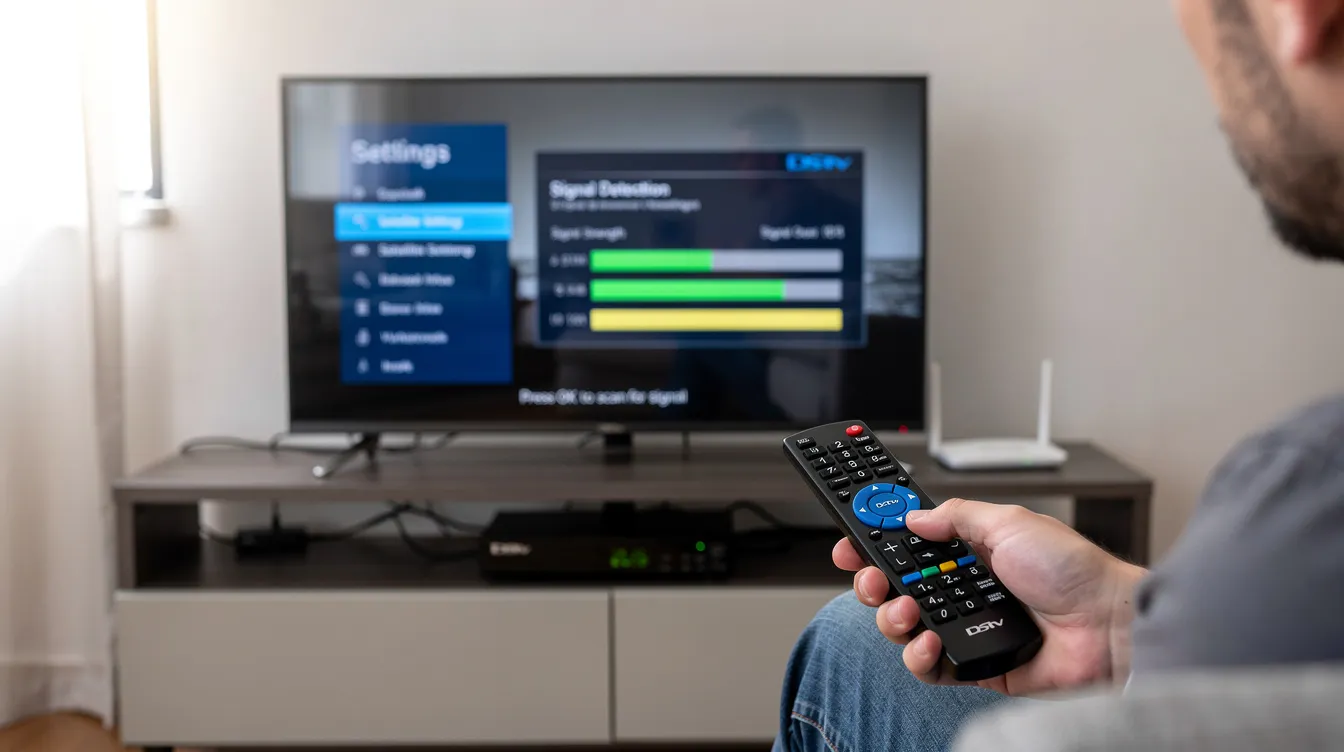
To scan for signal on DStv, press the “Menu” button on your remote, go to “Settings”, and select “Satellite Settings”. Here, you can check your DStv signal strength by viewing the signal strength values displayed on the screen. Then, choose “Home Network” and press “OK”. Next, select “Scan All Networks” and wait for the process to complete. Once the scan is finished, save the settings by pressing “OK”. This will refresh your channel list and help resolve any signal issues. When adjusting your dish or scanning, watch the signal quality bars and aim for a quality above 60% for the best viewing experience. If problems persist, consider contacting a professional DStv installer like Sat Digital for assistance.
For professional DStv installation and support, contact Sat Digital at 071 304 6955 or email info@satdigital.co.za. Visit our Contact Page for more information.
Are you struggling with missing channels or poor signal on your DStv decoder? Don’t worry—you’re not alone. Signal issues are common, especially after a power outage or software update. The DStv error code E48-32 indicates a signal problem, often caused by a misaligned satellite dish, damaged cables, or obstructions blocking the dish’s line of sight. Rebooting the DStv decoder can resolve minor software glitches that may contribute to the E48-32 error. When troubleshooting, always inspect the connectors (such as F-connectors) on your coaxial cables for rust or looseness, and ensure they are properly attached to avoid signal disruption. Fortunately, you can fix most of these problems by performing a manual signal scan. For accurate dish alignment, connect a DStv signal finder—a compact meter that connects between your satellite dish and decoder—to the LNB cable. A DStv signal finder helps you locate the strongest signal quickly and accurately, providing instant, live feedback as you adjust the dish. Alternatively, you can use your decoder’s built-in signal meter as a substitute. In this comprehensive guide, we will walk you through the steps to scan for signal on DStv effectively. Additionally, we’ll share useful tips to help you maintain a strong signal for uninterrupted viewing of your favourite channels.
Explore expert tips and guides on DStv installation and troubleshooting by visiting our Blog for the latest updates and insights.
1. Why Is Scanning for Signal Important on DStv?
Scanning for signal on DStv helps refresh your channel list and resolves issues like missing channels or weak signal strength. Obstructions such as trees or buildings can block the dish’s line of sight to the satellite, causing signal issues. Heavy rain, strong winds, or storms can also temporarily disrupt the signal, so it’s best to wait for the weather to clear before troubleshooting. Regular maintenance of the satellite dish, including checking for wear and tear, helps prevent future signal problems. This process is especially helpful after a decoder update, realignment of your dish, or when you have changed your setup. Therefore, knowing how to perform a signal scan can save you time and frustration. You might wonder, “How do I scan for signal on DStv effectively?”
Understanding DStv Signal
To enjoy uninterrupted entertainment on your DStv, it’s essential to understand how the DStv signal works and what factors can affect it. Your DStv signal is received via a satellite dish, which must be properly aligned to capture the broadcast from the satellite. This signal travels through a coaxial cable to your DStv decoder, where it’s decoded and displayed on your TV. The quality of your viewing experience depends on both signal strength and signal quality, which can be influenced by the position of your satellite dish, the condition of your cables, and any obstructions like trees or buildings blocking the dish’s line of sight. It is crucial to maintain a clear dish’s line of sight to the satellite, as any physical obstructions or misalignment can significantly interfere with the signal and reduce reception quality.
Your DStv decoder’s settings play a crucial role in maintaining optimal signal quality. By accessing the satellite settings through the menu button on your DStv remote, you can monitor signal strength and signal quality bars directly on your TV screen. These indicators help you adjust your dish installation for the best possible reception. If you have multiple decoders connected, it’s important to ensure each device is set up correctly and that all cables, including the LNB cable, are in good shape. Upgrading to a premium aluminum dish can further improve your signal quality and provide better weather resistance, ensuring a more reliable viewing experience.
Signal problems such as weak signal, missing channels, or signal loss can often be traced back to issues like damaged cables, incorrectly aligned dishes, or outdated decoder software. Using a signal finder can help you pinpoint the source of the problem. If you notice persistent signal issues, sound drops, or missing channels, start by checking the dish’s line of sight and making sure there are no obstructions. You can also use your DStv remote to access the satellite settings and review the signal quality bars for live feedback.
For more complex signal issues or if you’re unsure about adjusting your setup, it’s wise to seek professional help from a certified DStv installer. Expert assistance ensures your dish is correctly aligned, all connections are secure, and your decoder settings are optimized for the best signal quality. Regular maintenance, such as inspecting the LNB cable and keeping your decoder software updated, can help prevent future signal problems and keep your DStv channels running smoothly.
By understanding how your DStv signal works and taking proactive steps to maintain your equipment, you can fix common signal issues and enjoy a seamless viewing experience—whether at home or in your business. If you ever need help, don’t hesitate to contact a professional installer like Sat Digital for comprehensive support and expert advice.
Equipment Requirements for Scanning DStv Signal
Before you begin scanning for a DStv signal, it’s important to have the right equipment on hand. Start with a satellite dish that is correctly aligned to receive the DStv signal—this is the foundation of a strong connection. You’ll also need a DStv decoder, which processes the satellite signal and displays your channels on the TV. A reliable coaxial cable is essential for connecting the dish to your decoder, ensuring that the signal travels efficiently with minimal loss. For those looking to fine-tune their setup, a signal finder can be a valuable tool, offering precise feedback on signal strength and quality as you adjust your dish. However, you can also rely on the built-in signal strength and signal quality indicators found in your decoder settings. Make sure you have your DStv remote handy, as you’ll need it to access the satellite settings menu on your TV, monitor the signal, and initiate the scan. With these essentials in place, you’re ready to connect, access, and scan for the best possible DStv signal quality.
2. Quick Check Before Scanning: Inspect Your Connections
Before you proceed to scan for signal, it is essential to ensure that all connections are secure. Inspect the coaxial cable connectors (such as F-connectors) for any signs of rust, looseness, or damage, and replace or tighten them as needed to avoid signal disruption. Check the LNB cable at the back of your decoder and confirm that your dish is properly aligned and free from obstructions. If everything appears in order, you’re ready to start the scanning process.
If you still experience weak signal or missing channels, it might be time to get professional help. For reliable DStv installation and support, contact Sat Digital.
Signal Finder and Alignment: Getting the Best Position
Getting your satellite dish into the optimal position is key to enjoying a clear and stable DStv signal. A signal finder is an excellent tool for this process, providing live feedback on signal strength as you make adjustments. To use a signal finder, connect it between the LNB on your dish and the coaxial cable leading to your DStv decoder. As you slowly adjust the dish’s position, watch the signal finder’s display for improvements in signal quality. The aim is to achieve the highest possible signal strength, ensuring your dish is properly aligned with the satellite. This process may take some patience and fine-tuning, but the result is a significant reduction in signal problems and a much better viewing experience. Remember, even small adjustments can make a big difference, so take your time to get the alignment just right.
3. Troubleshooting Common Signal Issues
Problem: Low Signal Strength
-
Solution: Slightly adjust your dish’s alignment and re-scan for signal. Also, inspect the LNB for any damage when scanning for signal on DStv.
Problem: Missing Channels After Scan
-
Solution: Go back to the “Network Setup” > “Home Network” and repeat the scan until all channels are restored.
If problems persist, it’s advisable to reach out to Sat Digital DSTV installers for expert assistance.
DStv Signal Quality: What You Need to Know
Understanding DStv signal quality is crucial for uninterrupted viewing. Your decoder or TV screen will display signal strength and signal quality bars, which are your main indicators for diagnosing signal issues. High signal quality ensures clear picture and sound, minimizing sound drops and pixelation on your DStv channels. Several factors can impact signal quality, including the alignment of your satellite dish, any obstructions in the dish’s line of sight, the condition of your coaxial cable, and the performance of your LNB. Regularly checking these components and making sure everything is in good shape can help prevent signal loss and keep your channels running smoothly. By monitoring the signal quality bars and addressing any alignment or cable issues promptly, you can maintain a strong DStv signal and enjoy your favorite channels without interruption.
Common Mistakes to Avoid When Scanning DStv Signal
When scanning for a DStv signal, avoiding common mistakes can save you time and frustration. One frequent error is attempting to scan before ensuring the satellite dish is correctly aligned—this can lead to poor signal quality or no signal at all. Overlooking obstructions such as trees or buildings, or failing to check for damaged cables, can also result in persistent signal problems. Another pitfall is neglecting to update your decoder software or not using the DStv remote to properly adjust decoder settings, which can prevent your system from receiving the latest channels and updates. Lastly, trying to resolve complex signal issues without professional help can prolong the process and lead to further complications. By steering clear of these mistakes and seeking expert assistance when needed, you can streamline the scanning process and achieve optimal signal quality.
Best Practices for Scanning DStv Signal
To get the most out of your DStv signal scan, follow these best practices. Begin by checking that your satellite dish is properly aligned and that there are no obstructions blocking its line of sight. Use your DStv decoder’s built-in signal strength and signal quality bars to guide your adjustments, and consider using a signal finder for even more precise alignment. Regularly inspect your coaxial cable and LNB for any signs of wear or damage, as these can affect signal quality. When making adjustments, move the dish in small increments and monitor the signal quality bars on your TV or decoder screen for real-time feedback. If you continue to experience signal issues despite your efforts, don’t hesitate to contact a DStv accredited installer for expert assistance. By following these guidelines, you can ensure your DStv signal is optimized for the best possible viewing experience.
4. Pro Tips to Maintain Strong DStv Signal
-
Regular Maintenance: Check and secure all cables periodically.
-
Clear Obstructions: Ensure there are no trees or buildings blocking the dish’s line of sight.
-
Watch Signal Bars: When adjusting your dish or troubleshooting, watch the signal strength and quality bars on your decoder to ensure optimal setup.
-
Professional Installation: For the best results, consider a professional DStv installation from Sat Digital.
By following these tips, you can reduce the chances of experiencing signal problems in the future when you scan for signal on DStv.
5. When to Contact a Professional Installer
If you have tried all the above steps and still face signal issues, it might be time to call a professional. Certified DStv installers, like Sat Digital DSTV installer , can diagnose and fix the problem efficiently. Professional help ensures that your dish is correctly aligned and that all connections are secure.
Conclusion: Enjoy Uninterrupted Viewing
In summary, scanning for signal on DStv is a straightforward solution to common signal problems. By following the steps outlined above, you can quickly restore your channels and improve signal strength. If you need expert help, don’t hesitate to reach out to for professional installation and support.
For more helpful guides, explore our blog or contact us today for all your DStv installation needs!
For official DStv packages, channels, and account management, visit the DStv website for more information.