Seamless Activation for an Uninterrupted Viewing Experience
Upgrading your DStv decoder, performing an upgrade, or adding a new one to your existing account should be a smooth and stress-free process. However, if you don’t follow the right steps, you may run into frustrating delays, activation errors, or connection issues. Many users experience activation delays when linking their DStv decoders. Fortunately, with the right approach, you can answer the question “How Do I Link a New DStv Decoder to My Existing Account?” quickly and get back to enjoying your favorite entertainment without unnecessary hassles.
When linking a new decoder, make sure to register the new device as part of the activation process to ensure it is properly connected to your account.
DStv Extra View – Everything You Need to Know
DStv Extra View lets you connect multiple decoders under one subscription, allowing different rooms to watch separate channels. You can link up to three decoders using DStv Extra View, with the primary decoder being an Explora. However, setting it up correctly is key to avoiding signal and activation issues. For a complete guide on how to set up, troubleshoot, and maximize Extra View, check out our detailed blog post here
Whether you are replacing an old decoder, setting up DStv Extra View, or simply upgrading to a newer model, understanding the linking and registration process is crucial. The good news is that DStv provides multiple ways to activate and register your decoder, including online self-service, the MyDStv app, WhatsApp, and USSD codes. Even though these options are designed to be user-friendly, many users still experience issues due to incorrect setups, signal problems, or smartcard errors. If you registered your decoder or upgraded your setup a few months ago, ensure your account details are up to date.
That’s why we’ve put together this comprehensive guide to help you link and register your new DStv decoder effortlessly. Not only will we walk you through each step, but we’ll also address common troubleshooting issues, provide expert recommendations, and answer frequently asked questions (FAQs). DStv Extra View has an access fee, which is K190 for two decoders and K380 for three decoders. And, if you want professional assistance to ensure everything works perfectly, Sat Digital DStv installers, your trusted DStv installer, is ready to help!
So, let’s dive in and explore how to link and register your new DStv decoder to your existing account without delays or complications.
Why Should You Link a New DStv Decoder?
Linking a new DStv decoder ensures uninterrupted viewing, whether you’re upgrading, replacing a faulty device, or setting up Extra View. You need to pay for your subscription to activate and use the new decoder. Plus, a new decoder offers better performance and access to the latest features. To avoid disruptions, it’s important to link it correctly and activate it on your account as soon as possible. Always verify your subscription status and payment history to avoid service interruptions when linking a new decoder.
Choosing the Right New DStv Decoder
Selecting the right new DStv decoder is the first step toward an upgraded viewing experience. With several models available, it’s important to consider which features best suit your needs. If you’re after advanced functionality or looking to upgrade from an older model, the DStv Explora decoder is a top choice. It offers HD viewing, the ability to record, pause, and rewind live TV, plus access to Box Office, Catch Up, and Catch Up Plus—perfect for families or anyone who doesn’t want to miss a moment of their favorite shows.
For those seeking a more budget-friendly option, the DStv HD decoder delivers crisp high-definition viewing without the extra bells and whistles. It’s ideal if you simply want reliable access to your favorite channels without advanced recording features.
Before making your purchase, ensure your new DStv decoder is compatible with your existing satellite dish and LNB cable setup. Compatibility is key to a smooth installation process and uninterrupted service. If you’re unsure, consulting a DStv accredited installer in South Africa—like Sat Digital—can save you time and hassle. These professionals can assess your current installation, recommend the best decoder for your needs, and handle the installation process from start to finish. Make sure your decoder is properly installed before proceeding with activation or registration.
Don’t forget to check the warranty and support options provided by the manufacturer. Reliable after-sales service and access to troubleshooting resources, such as online forums and customer support hotlines, can make all the difference if you encounter any issues down the line.
By choosing the right new DStv decoder and working with a trusted installer, you’ll enjoy seamless access to your favorite content, whether you’re watching live TV, streaming, or catching up on missed episodes. For expert advice and installation in Cape Town and the Western Cape, Sat Digital is always ready to help you get the most out of your DStv service.
Step-by-Step Guide: How to Link Your New DStv Decoder
Step 1: Check Your Subscription and Decoder Compatibility
Before linking your new decoder, check your subscription status to ensure your DStv subscription is active and that the decoder is compatible with your package. Also, make sure your new decoder is properly installed before attempting to link it. If replacing an old decoder, make sure it is disconnected from your account to prevent activation issues. If you’re unsure, visit DStv.com or contact Sat Digital for expert advice.
For guidance, visit DStv.com or contact Sat Digital DSTV installer for professional support.
Step 2: Connect the New Decoder to Power and Dish
-
Plug in your decoder and ensure it is receiving power.
-
Connect it to your satellite dish using the correct cables.
-
Check all necessary ports (such as HDMI or USB) are properly connected to your TV and any other devices.
-
For Extra View, ensure that the primary and secondary decoders are connected via a Smart LNB or a DStv Switch.
You can also use your phone to assist with setup or to connect and transfer media files to the decoder via the USB port.
Need installation help?Sat Digital offers expert DStv installation and decoder setup services.
Step 3: Link Your Decoder to Your Account
There are several ways to link your new decoder. During the process, you will need to register your decoder to your DStv account to ensure proper activation and access to services. Choose the method that works best for you. Please note, you may also need to pay your subscription or access fee to complete the activation and start enjoying your channels:
Option 1: Use the MyDStv App (Fast & Easy)
-
Download the MyDStv App from the Google Play Store or Apple App Store.
-
Log in using your registered details.
-
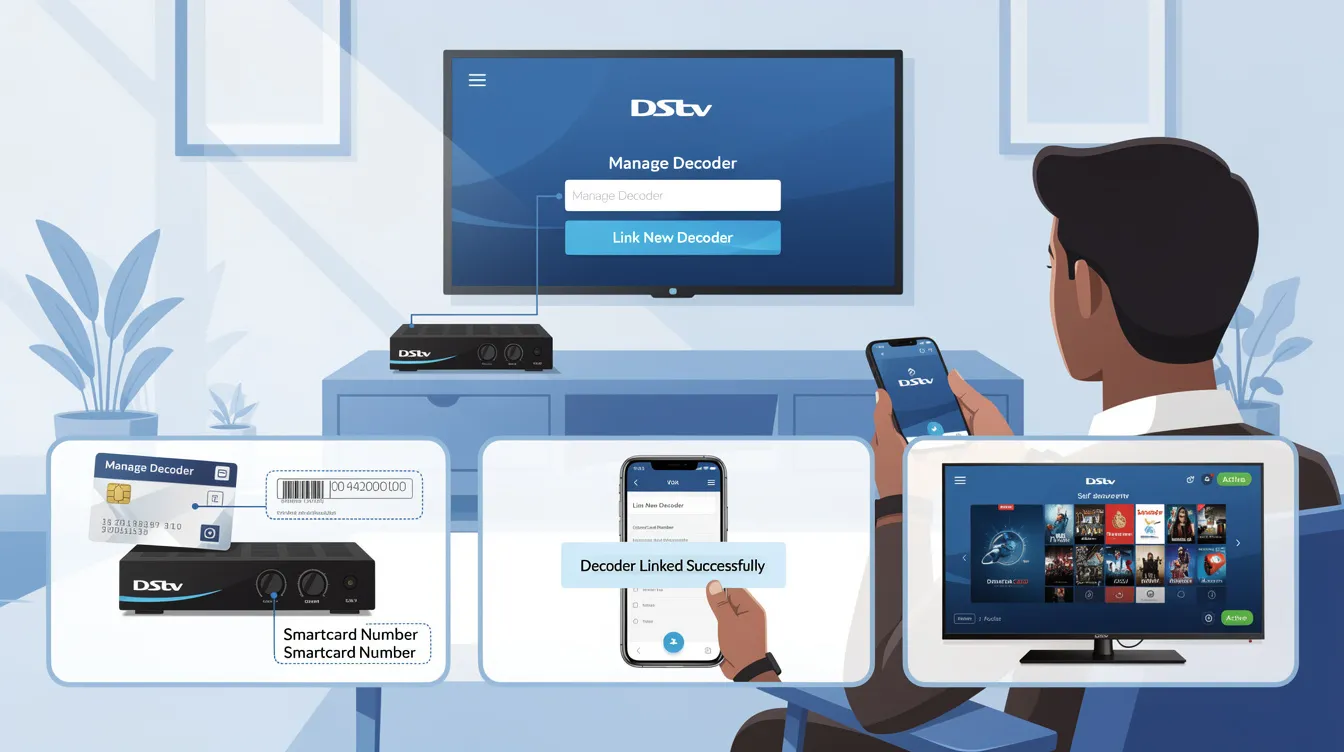
Go to “Manage Decoders” or “Add a Decoder”
-
Enter your new decoder serial number and smartcard number
-
Register your new decoder by following the prompts in the app to link it to your account.
-
Confirm and restart your decoder.
-
Also don’t forget to check the frequency
-
Visit DStv.com and log into your account.
-
Select Self-ServiceManage Decoders
-
Enter your new decoder’s details and follow the prompts to link it.
For step-by-step guidance, you can follow along using the transcript if available.
Option 3: Link via USSD or WhatsApp
-
Dial12068584#** and follow the on-screen instructions to link and register your new decoder with your account.
-
Alternatively, send a WhatsApp message to 060 060 3788 with your smartcard number and new decoder details to register and activate your decoder.
First Time Linking Experience
Linking a new DStv decoder for the first time can feel daunting, but with the right approach, it’s a straightforward process. Before you begin, ensure your decoder is properly installed—confirm that the device has been installed and set up correctly, as this is essential before starting the linking process. Start by connecting your new decoder to your TV and satellite dish, making sure all cables—including the LNB cable and power cable—are securely plugged in. This ensures your decoder receives both signal and power, which are essential for a successful activation. If you set up your decoder months ago and need to update or re-link it, the process remains the same—just follow the steps below to refresh your connection.
Once everything is connected, switch on your decoder and follow the on-screen instructions carefully. You’ll typically be prompted to enter your smartcard number and account details—so have these handy. The on-screen menu will guide you through each step, making it easy even if you’re new to DStv.
If you run into any issues during the linking process, don’t hesitate to reach out to DStv customer service or visit the DStv website for free troubleshooting guides and FAQs. Checking your signal strength is also important; a weak signal could indicate your satellite dish needs realignment or that there’s an issue with your LNB.
After successful activation, you’ll have access to your full range of channels and exclusive content. To keep your decoder running smoothly, remember to update its software regularly—this ensures you benefit from the latest features and security updates.
With a little patience and attention to detail, your first-time linking experience can be hassle-free. And if you ever need extra help, Sat Digital’s team of professional installers is just a call away, ready to assist with setup, troubleshooting, and ongoing support. Enjoy your new DStv decoder and the world of entertainment it brings to your home or business! You can also use your decoder to play videos, music, and view images from a USB flash drive, making it a versatile multimedia player for your TV.
Managing Your Account and New Device
Once your new DStv decoder is linked and activated, effective account and device management is key to enjoying uninterrupted entertainment. Whether you’ve just set up a DStv HD decoder or upgraded to a new DStv model, taking a few extra steps can help you get the most out of your viewing experience.
Start by personalizing your decoder settings. Use the on-screen menu to scan for channels, set up parental controls, and adjust audio or subtitle preferences to suit your household. If you’re using a DStv HD decoder, explore features like favorite channel lists and reminders so you never miss your top shows.
It’s also important to keep your account details up to date. Log in to your DStv account online or via the MyDStv app to check your subscription status, update your contact information, and manage linked devices. This ensures you receive important service notifications and can easily troubleshoot if any issues arise.
If you encounter problems—such as missing channels, error messages, or device glitches—start with basic troubleshooting. Restart your decoder, check all cable connections, and verify your satellite signal strength. For more persistent issues, use the self-service troubleshooting guides available on the DStv website or app. These resources can help you resolve common decoder and account problems quickly, without waiting for customer support.
Regularly updating your decoder’s software is another smart move. Software updates often include new features, security enhancements, and bug fixes that keep your device running smoothly. Most new DStv decoders will prompt you when updates are available, but you can also check manually through the settings menu.
Managing multiple devices on one account? Make sure each decoder is correctly registered and linked to avoid service interruptions. If you ever need to add or remove a device, the MyDStv app and online portal make it easy to manage your setup from anywhere.
And remember, if you run into challenges you can’t solve on your own, Sat Digital’s expert team is always ready to assist. From advanced troubleshooting to full decoder upgrades and account management, we’re here to ensure your DStv experience is hassle-free.
By staying proactive with your account and new DStv decoder, you’ll enjoy seamless access to all your favorite content—no matter how your viewing needs evolve.
Troubleshooting: What If Your Decoder Doesn’t Link?
Even if you follow the correct steps, you may run into activation or registration issues. Here are some common problems and how to fix them:
If you experience issues with recording or playback, check your decoder’s hard drive for problems, as a faulty or disconnected hard drive can affect these functions.
If issues persist while trying to register or link your new decoder, you may need to contact DStv customer support for manual registration and linking.
1. Activation Delay
If your decoder does not link immediately:
-
Wait 15-30 minutes before retrying.
-
Restart your decoder and check your signal strength.
2. Smartcard Errors
-
Make sure the smartcard is inserted correctly.
-
If you are using a newer decoder model, the smartcard may be built-in.
3. Extra View Not Working
-
Both decoders must be switched on for Extra View to work.
-
Check that the heartbeat cable is correctly connected.
For professional assistance, Sat Digital can help with troubleshooting and installation.
Frequently Asked Questions (FAQs)
1. How long does it take to link a new DStv decoder?
It usually takes 5-10 minutes, but in some cases, it may take up to 30 minutes for activation to complete.
2. Can I link multiple decoders to one account?
Yes! DStv allows you to link up to three decoders using Extra View
3. Do I need an installer for linking a new decoder?
For simple decoder replacements, self-linking works fine. However, for Extra View or Smart LNB setups, a professional installer like Sat Digital is recommended.
4. What should I do if my decoder isn’t working after linking?
What Should I Do If My Decoder Isn’t Working After Linking?
If your decoder isn’t working after linking, don’t worry—there are a few quick fixes to try. First, restart your decoder and check if the activation completes. Next, ensure your satellite signal is strong and that all cables are properly connected. Additionally, confirm that your subscription is active, as expired accounts may cause issues. If the problem persists, you can contact DStv support or get expert assistance from Sat Digital for a hassle-free solution.
5. Can I transfer my old subscription to my new decoder?
Yes! Once your old decoder is deactivated, your active subscription will automatically transfer to the new one.
Need Professional Help? Contact Sat Digital Today!
Although linking your DStv decoder can be done through self-service, technical issues may arise. To avoid frustration and ensure a hassle-free experience, get expert assistance from Sat Digital.
Need Help? Contact Sat Digital Now!
Visit Satdigital.co.za to book a DStv installer today!
Final Thoughts
Linking your new DStv decoder is essential for uninterrupted entertainment, whether you’re upgrading, replacing, or adding Extra View. By following the correct steps, you can complete the process within minutes. However, if you encounter any issues, Sat Digital is here to assist with professional installation and support.
Enjoy seamless TV viewing with a properly linked DStv decoder today!