How To Fix DStv Signal Problem (Step‑By‑Step Guide For Cape Town Homes & Businesses)
Nothing ruins a sports night or family movie time quite like seeing “No signal” flash across your TV screen—especially when it’s the common ‘DSTV no signal’ error. If you’re dealing with a DStv signal problem in Cape Town or anywhere in the Western Cape, you’re not alone—and in most cases, the fix is simpler than you might think. Always remember to check cables as a first troubleshooting step.
This guide walks you through exactly what causes DStv signal issues, how to diagnose them using your decoder menu, and which problems you can safely fix yourself versus when to call in a professional DStv installer like Sat Digital.
Introduction to DStv Signal
The DStv signal is the backbone of your satellite TV experience, delivering a wide variety of channels and entertainment straight to your home or business. When your DStv signal is strong and stable, you enjoy seamless access to your favourite shows, sports, and news without interruption. However, even a minor issue with your DStv signal can quickly lead to frustration—whether it’s a sudden “no signal” error, poor signal quality, or ongoing signal loss that disrupts your viewing.
Understanding how the DStv signal works and what can go wrong is the first step to resolving any signal problems. Signal errors can be caused by anything from weather conditions and physical obstructions to misaligned satellite dishes or faulty cables. In this guide, we’ll walk you through the most common DStv signal issues, explain how to diagnose them, and provide practical steps to fix DStv signal problems. Whether you’re dealing with missing channels, intermittent signal drops, or persistent signal errors, you’ll find the information you need to restore your DStv signal and get back to enjoying your channels without hassle.
How to fix a DStv signal problem right now
Before diving into technical details, here are the fast checks you can do right now to restore your picture. Most signal errors—including the common E48-32—come down to a few predictable causes.
Immediate steps to try:
Confirm your TV is on the correct HDMI input (look for “DStv” or “HDMI1” on your TV’s source menu)
Check that your DStv decoder has a solid green light on the front panel, not amber or off
Ensure your decoder is properly plugged into a reliable power source
Unplug your decoder from the mains for 2–5 minutes, then plug it back in and wait for a full reboot
Gently hand-tighten the coaxial cable connector on the back of your decoder (marked “LNB IN”)
Look at your screen—if you see an E48-32 error message or “Searching for signal,” note that down
Check the weather: heavy rain over Cape Town or Johannesburg (where DStv studios handle the uplink) causes temporary signal loss
Step outside briefly and confirm nothing obvious is blocking your satellite dish
Rebooting your decoder periodically can help clear minor software errors and restore normal operation.
The reality: Around 70–80% of “No signal” and E48-32 cases trace back to loose or damaged cables, a wind-shifted dish, or rain fade—not a broken decoder. The decoder itself rarely fails.
If these quick checks don’t restore your picture within 10–15 minutes and the weather is clear, it’s time to contact Sat Digital for professional assistance. We cover Cape Town and the broader Western Cape with same-day appointments. If the problem persists after all quick checks, you can also contact DSTV for support or seek further assistance from a qualified technician.
If you have tightened your cables, rebooted your decoder, and waited for the weather to clear but still have no signal, it is time to call a technician.
Understanding DStv signal problems & errors (including E48‑32)
To fix signal problems effectively, it helps to understand what’s actually happening when your screen goes dark.
What “no signal” and E48-32 mean:
The E48-32 error code specifically means “no signal being received by tuner”
You might see it displayed as “Searching for signal” or “No signal found”
The E48-32 error message is a common signal error message displayed on DSTV decoders.
This appears on DStv Explora, HD single/dual view, and XtraView decoders
It’s different from decoder hardware faults (like E143 overtemperature) or subscription errors
How your satellite signal chain works:
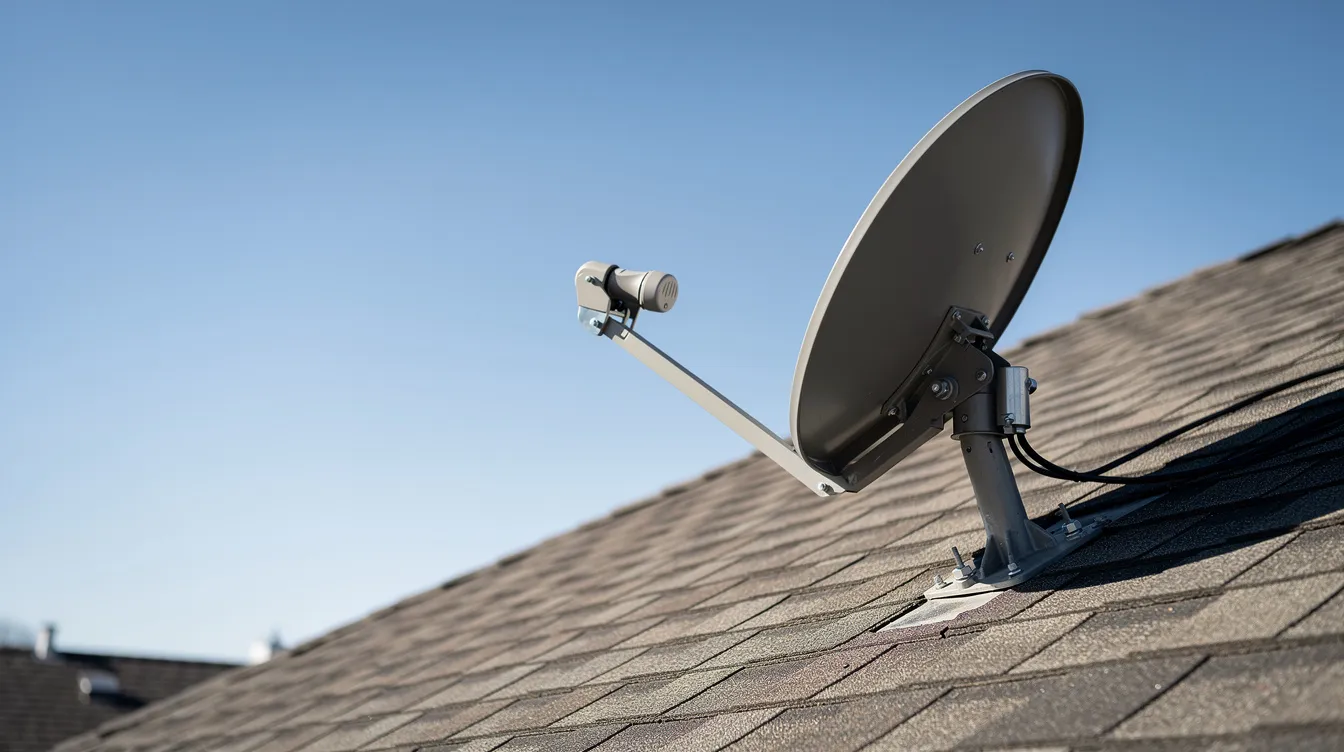
The DStv satellite (Eutelsat 36B at 36.0° East) beams a signal down to your dish. Your dish captures it and sends it through:
LNB (the small device at the front of your dish) → amplifies the weak satellite signal
Coaxial cable → carries the signal indoors
Decoder → processes the signal
HDMI/AV cable → sends picture to your TV
It’s essential to ensure your decoder is set to the correct satellite for your region, such as Eutelsat 36B, to avoid signal issues or weak signals despite high signal quality readings.
A fault anywhere in this chain causes a signal error. The decoder reports E48-32 when its tuner receives zero or critically low radiofrequency input—typically when signal strength drops below 40–50%. Inspecting the signal cable for cuts or breaks is essential to resolve E48-32 errors. A signal issue is a common cause of DSTV errors.
Why Cape Town sees more issues:
Strong south-easterly winds (averaging 20–40 km/h in summer) shift dish alignment
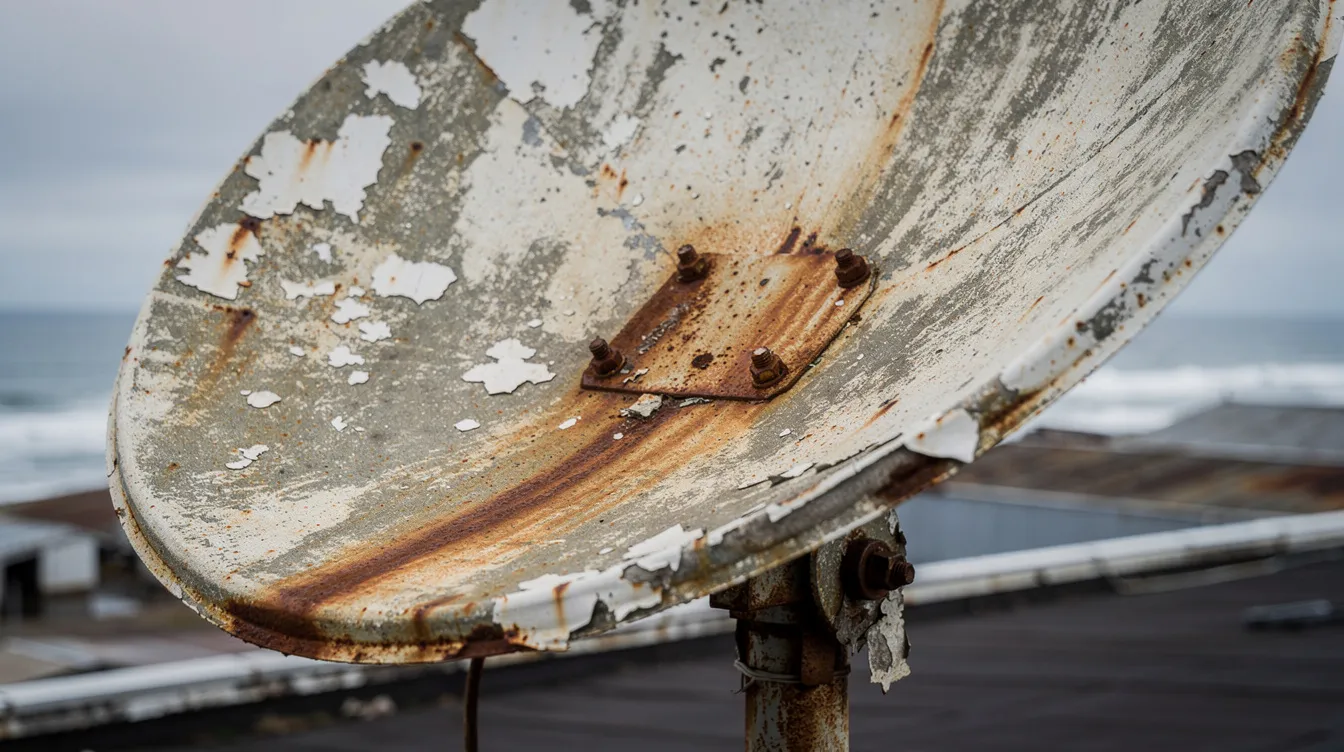
Coastal humidity and salt-laden air accelerate rust on mounts and corrosion on connectors
Winter fronts bringing heavy rain cause rain fade, attenuating Ku-band signals by 5–15 dB. Rain fade occurs when rain blocks the DStv signal, causing the E48-32 searching for signal or no signal error.
Atlantic Seaboard installs in areas like Blouberg or Clifton often fail within 2–5 years without proper galvanised hardware
Start indoors: basic checks before touching the dish
Always begin troubleshooting from the safety of your living room. Many dstv signal issues resolve without anyone going near the roof.
Indoor troubleshooting checklist:
Verify your TV input: Press the Source or Input button on your remote control. Make sure you’ve selected the correct HDMI port (often labeled HDMI1 or “DStv” on Samsung and LG models common in SA homes).
Confirm decoder power status: Your DStv decoder’s front panel LED should be solid green when powered on. Amber means standby mode—press the power button on your DStv remote to wake it.
Power cycle properly: Unplug the decoder from the mains completely. Wait 2–5 minutes (this discharges capacitors and resets tuner firmware). Plug back in and wait for the full boot sequence. This simple step restores signal in roughly 40% of intermittent cases.
Test multiple channels: If only certain channels fail while others work, you likely have a marginal alignment or LNB issue—not total signal loss. SuperSport channels on one transponder might drop out while news channels on another work fine.
Rule out subscription issues: Check your DStv account status. An expired subscription can look like signal loss. Access Settings in your decoder menu to verify, or dial 12068584# for self-service. The default parental lock PIN (9949) can also block channels and mimic signal problems.
If all else fails, try resetting your decoder to factory defaults. This process restores the default configuration but does not delete your recordings or saved shows.
No tools required for any of these steps. If everything checks out but you still have no picture, move on to cable inspection.
If the no signal message persists, use the DStv app or website to send a reset command to your smartcard.
Check decoder cables and wall point
Loose or damaged cables between your wall point and decoder are among the cheapest problems to fix—and among the most common causes of DStv signal loss. It’s essential to ensure all cables and connectors are functioning correctly to maintain optimal signal reception.
What to inspect:
The F-connector at your decoder: Locate the port marked “LNB IN” (or “Unicable IN” for smart LNB setups). Gently wiggle the connector while watching your signal. If the picture flickers, you’ve found intermittent contact resistance, often from oxidized threads. Hand-tighten securely—it should be finger-tight, not wrench-tight.
The coaxial cable run: Follow the white RG6 coax from your wall socket to decoder. Look for kinks, crush marks, or chew damage from pets or rodents. Even a small crimp can cause 2–3 dB of signal loss.
HDMI or AV cables: Check both ends of the cable connecting decoder to TV. Bent pins or frayed connections won’t affect RF signal but can cause “no picture” that looks like a signal problem.
The wall plate itself: In older Cape Town flats—especially those built before 2010 near the coast—brass wall plates often show green corrosion from sea spray. This faulty connection adds resistance and degrades signal. Clean contacts gently with a dry cloth or replace the plate entirely.
For XtraView dual-decoder setups:
Both decoders must have their LNB/unicable cables in the correct ports. A typical smart LNB configuration assigns tuner 0/1 on ports 0/1, with the secondary decoder on port 2. Mismatched ports cause “tuner 2 no signal” errors that the installation wizard should have configured correctly.
Using the DStv menu to check signal strength & quality
Your decoder’s signal meter is the best diagnostic tool available—no roof access required. This tells you exactly what your dish is delivering.
How to access signal readings:
Press the blue DStv button on your remote
Navigate to Settings
Select Satellite Settings (or General then Satellite Settings on some models)
Choose Signal Strength or Tuner Status
You’ll see two key numbers displayed in real-time.
Understanding the readings:
Reading | Good | Borderline | Problem |
|---|---|---|---|
Signal Strength | 75–95% | 50–70% | Below 50% or zero |
Signal Quality | 85–95% | 60–80% | Below 60% |
Signal strength represents raw power level (how much RF energy your dish captures)
Signal quality reflects bit error rate after error correction (how clean that signal is)
Low signal strength or quality readings are a clear sign of poor reception, which can be caused by weak signal, obstructions like trees, or a misaligned satellite dish.
What different readings mean:
Zero on both metrics: Open circuit somewhere—check LNB, cable connections, or dish pointing completely off-target
Low quality but decent strength: Likely 1–2° misalignment or incorrect skew angle, reducing polarization match by 3–6 dB
Good readings but still E48-32: Possible frequency lock failure from outdated LNB oscillator drift, or incorrect unicable user band settings in your decoder setup
When you correct dish alignment or fix cable issues, signal returns and your channels should play normally again.
For Cape Town viewers pointed at Eutelsat 36B, optimal readings hit 80–95% strength and 90%+ quality on test transponders. Anything consistently below 60% quality in clear weather suggests physical alignment issues that won’t fix themselves.
If you’re experiencing DStv signal issues such as error E48-32, try power cycling your decoder by unplugging it for 30 seconds before checking your signal readings again.
Common outdoor causes: dish, LNB, cable & weather
When indoor checks come back clean but signal problems persist, the issue usually lives outside. Cape Town’s unique conditions make outdoor equipment work harder than inland installations.
Wind and mechanical shift:
Cape Town’s prevailing south-easterly winds—gusting up to 100 km/h during summer—apply significant torque to dish brackets. An undersized 60cm dish (the minimum recommended is 80cm for adequate margin) is especially vulnerable. Rust pitting on steel bolts accelerates this, with some installations failing within 3 years. A slight shift of just 1–2° can drop signal quality by 10% or more.
Rain fade:
Heavy rain, hail, or dense cloud cover over Cape Town or Johannesburg causes temporary signal loss. Water droplets absorb and scatter Ku-band frequencies. During Western Cape winter fronts with rainfall exceeding 10mm/hour, signal can attenuate 5–15 dB—enough to trigger E48-32. This typically resolves within 30–60 minutes after weather clears. Don’t adjust anything during bad weather—wait it out first.
Physical obstructions:
Trees grow. Buildings go up. A clear line of sight that existed when your dish was installed may not exist today. Fast-growing species like ficus and bougainvillea common in Cape gardens can reach 5 metres per year. Overgrown plants in front of your DStv dish can cause you to lose signal and trigger the E48-32 error; clearing these obstructions can help improve reception and prevent this issue. New developments—like high-rises in Century City or Parklands blocking 10–15° arcs—have caused signal drops of 20 dB for some viewers since 2024.
Perished LNB:
Your LNB lives outdoors year-round. Look for:
Cracked plastic housing allowing water ingress
Verdigris (green corrosion) on the F-connector
Dielectric bulge from UV embrittlement
Water dripping from the LNB neck
A degraded LNB can drop from 60 dB gain to 30 dB—halving effective signal. Visually check your satellite dish for any obstructions and inspect the LNB for signs of water damage or cracks.
Damaged outdoor cables:
Pre-2015 installations often used RG59 cable (6 dB loss per 10m) instead of modern RG6 (3 dB loss per 10m). Sun-baked joints and tape-spliced connections let moisture in, boosting attenuation dramatically. Check visible cable runs for cracking, bulging, or obvious water damage.
If you continue to lose signal after these checks, professional DSTV installers have the expertise and equipment to resolve persistent outdoor signal problems quickly and reliably.
How to fix DStv signal problems without climbing on the roof
Safety first. Do not work at heights without proper equipment. Only a correctly aligned dish and LNB will provide optimal signal reception, and working with heights and satellite alignment requires specific safety gear and diagnostic tools. These fixes keep you on solid ground.
Safe ground-level interventions:
Clear obstructions: If your dish is mounted low (within reach), you can safely trim small plants or branches blocking the line of sight to the satellite. Even a few leaves in the signal path cause problems.
Protect exposed connectors: Wrap any outdoor F-connectors with self-amalgamating tape or proper heat-shrink boots (IP67 rated). This prevents further water ingress and corrosion.
Clean and reseat wall plates: If you can access your wall plate indoors, remove it, clean any corrosion gently with white vinegar (which neutralises chlorides from sea air), and reconnect firmly.
Decoder settings verification:
Access the installation wizard on your decoder:
Navigate to Settings > Installation
Confirm country is set to “South Africa”
Verify satellite is Eutelsat 36B (auto-selected for SA)
Check LNB type matches your setup: Universal (9.75/10.6 GHz LO) for standard installs, or Unicable for XtraView smart LNB configurations
Use DStv self-service:
Once physical issues are resolved, clear any residual software errors:
Dial 12068584# from your mobile
Use the DStv app
Visit the DStv website self-service portal
Why DIY alignment is risky:
Adjusting dish azimuth, elevation, or skew without a proper signal meter (costing R200+ for basic models) typically makes things worse. In windy Cape Town suburbs like Table View, Fish Hoek, or Blouberg, a 1° error equals roughly 10% quality loss. Professional technicians use meters accurate to ±0.5°. Leave dish alignment to the experts.
Special case: DStv error E48‑32 “Searching for signal / No signal”
E48-32 is the single most common DStv signal error. E48-32 is a signal error message that indicates a signal issue, usually caused by problems with your satellite dish, cable connections, or decoder. If this specific error brought you here, this focused mini-guide is for you.
Top causes of E48-32:
Heavy rain over Cape Town or Johannesburg uplink
Dish misaligned after wind (even a slight shift causes this)
Faulty LNB (degraded or water-damaged)
Loose F-connectors at decoder, wall plate, or LNB
Damaged cable (water ingress, rodent damage, UV degradation)
Poor original installation that was always marginal
E48-32 troubleshooting flow:
Check weather → If it’s raining heavily, wait 30–60 minutes for skies to clear
Reboot decoder → Full power cycle (unplug 2–5 minutes)
Inspect LNB cable → Check connector at decoder is securely connected, no visible damage
Verify signal in menu → Access signal meter to see actual readings
Decide next step → If readings are zero or critically low in clear weather, call an accredited installer
If the E48-32 error persists after checking all connections and dish alignment, it is recommended to contact a professional DStv technician to resolve the signal issue.
E48-32 on only some channels:
This often indicates marginal alignment rather than complete failure. When only certain channels drop while others work, your dish is likely pointing close enough to receive strong transponders but not weak ones. This is a wrong LNB skew angle or 1–2° misalignment issue, not decoder failure.
Cape Town scenario:
Signal works fine during the day but E48-32 appears at night. Why? Cape Town’s 10–20°C daily temperature swings cause metal components to expand and contract slightly. A borderline installation that reads 70% in warm afternoon sun might drop to 55% overnight—enough to lose lock on HD channels during the PSL match you’ve been waiting for.
For persistent E48-32: Contact Sat Digital. We resolve 90% of E48-32 calls through cable checks or dish tweaks without equipment swaps—saving you the cost of unnecessary decoder replacements. Hiring experienced technicians is worth every penny when it comes to complex DStv no signal issues.
When the problem is your installation (dish, LNB, cabling) – not the decoder
Many chronic signal issues trace back to how the original DStv installation was done—or how it’s degraded over time.
Signs of substandard workmanship:
Tape-spliced cable joints instead of proper crimp-on compression F-connectors (which add less than 0.1 dB loss vs. 2+ dB for taped joints)
Loose mast that wobbles 2–5° in 30 km/h wind
Dish visibly skewed or not level
Cable running through open windows instead of proper wall points
Incorrect skew angle for your location (varies from -13° in Bellville to +2° in Atlantis)
Outdated equipment failures:
Equipment | Coastal Lifespan | Inland Lifespan | Problem |
|---|---|---|---|
Steel dish | 3–5 years | 7–10 years | Rust, pitting |
Single LNB | 3–5 years | 5–7 years | Can’t handle multi-decoder |
RG59 cable | 2–4 years | 5–7 years | 30% higher signal loss than RG6 |
Brass connectors | 2–3 years | 5+ years | Galvanic corrosion |
Older single LNBs can’t support multi-decoder setups. RG59’s higher loss (6 dB/10m vs. RG6’s 3 dB/10m) dooms cable runs longer than 15–20 metres.
Multi-decoder and Extra View sensitivity:
XtraView configurations demand precise wiring and correct LNB choice. A smart LNB (like the Inverto Quad Black) assigns 8 user bands without splitter losses—each splitter adds 3 dB loss. A twin or quad LNB with improper cabling causes chronic tuner conflicts and intermittent signal on secondary decoders.
When to upgrade:
If your signal readings are consistently marginal (50–65%) despite clear skies, consider upgrading to a 90cm aluminium dish (25% lighter, 50% less corrosion than steel) and a modern smart LNB. This adds roughly 4 dB of fade margin—the difference between losing signal during every storm and maintaining picture through all but the heaviest downpours.
For best results, it’s important to hire professional DSTV installers. Hiring a qualified DStv technician for installation and maintenance can ensure proper setup and reduce future issues.
Sat Digital handles full installation upgrades across Cape Town and the Western Cape, bringing older systems up to 2026 standards.
Smart LNB solution: what it is and when you need it
If you’re struggling with ongoing DSTV signal problems—like weak signal strength, frequent signal loss, or trouble accessing certain channels—a Smart LNB could be the game-changer your DSTV setup needs. But what exactly is a Smart LNB, and when should you consider upgrading?
A Smart LNB (Low Noise Block) is an advanced component fitted to your DSTV satellite dish. Unlike standard LNBs, the Smart LNB is designed to optimize satellite signal reception, reduce interference, and deliver a stronger, more stable DSTV signal to your decoder. This is especially important in Cape Town and the Western Cape, where weather conditions, coastal corrosion, and physical obstructions can all impact signal quality.
Advanced troubleshooting for persistent DStv signal problems
If you’ve worked through the basic troubleshooting steps and your DStv signal problems persist, it’s time to dig a little deeper. Advanced troubleshooting can help pinpoint stubborn issues that aren’t resolved by simply rebooting your decoder or tightening cables.
Start by carefully inspecting your satellite dish from the ground. Check if the dish appears to have shifted or tilted—strong winds or accidental bumps can easily knock it out of alignment, leading to weak signal strength or total signal loss. Next, examine the LNB (the small device at the end of the dish arm) for any visible cracks, water damage, or signs of corrosion. A faulty or misaligned LNB is a common culprit behind ongoing DStv signal issues.
For a more precise diagnosis, use a signal meter to measure the actual signal strength and quality being received by your system. Many DStv decoders have a built-in signal test in the DStv menu—navigate to the signal meter section and check the readings. If the signal strength or quality is low, or if the decoder is not locking onto the correct satellite, you may need to adjust the dish alignment in small increments. Always ensure your decoder is set to the correct satellite for your region, as selecting the wrong satellite can result in persistent signal problems.
Don’t forget to look for physical obstructions such as overgrown trees, new buildings, or other objects that might be blocking the line of sight between your satellite dish and the sky. Even partial obstructions can cause significant signal degradation.
If you’re not comfortable performing these advanced checks or making adjustments to your satellite dish, it’s best to contact a professional DStv installer. An accredited technician has the tools and expertise to safely assess your setup, fix DStv signal problems, and ensure your system is functioning at its best.
DIY vs professional help: when to call Sat Digital
Quick indoor checks are worth trying. But some jobs need a DStv accredited installer with proper meters, safety gear, and experience.
Stop and call an expert when:
E48-32 persists after completing all indoor checks described above
Your dish is mounted higher than a single storey (fall risk per SA OHS Act)
Visible damage exists on dish arms, LNB housing, or cable runs
Signal strength stays below 50% despite clear weather
You have a commercial setup (multiple decoders, headend systems)
You lack a professional signal meter for dish alignment
You are unsure about the problem or need further assistance—contact DSTV customer support for troubleshooting or to confirm if there are network outages
If you have ruled out simple indoor faults, a technician can focus only on the parts that really need work.
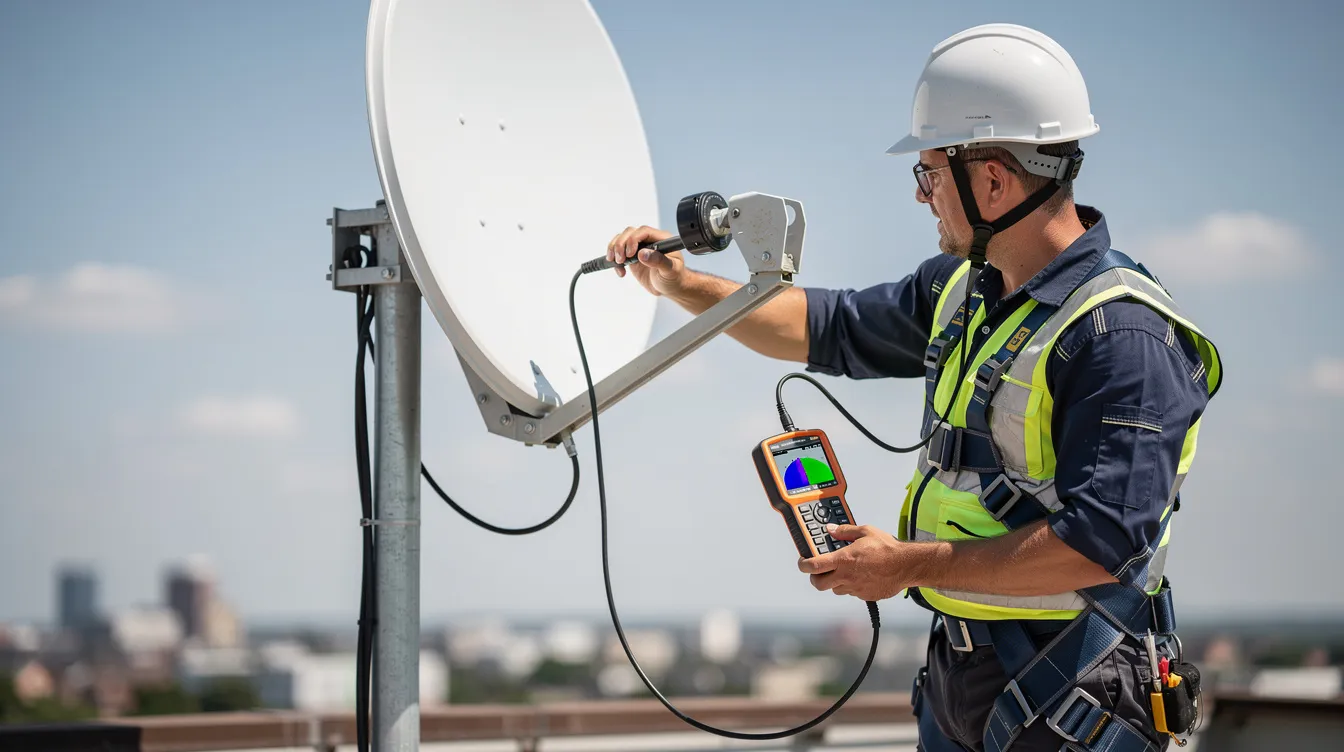
What a professional DStv installer does on site:
Tests cable integrity with proper RF tools
Measures signal with field-strength meters (0.1 dB accuracy, full DVB-S2 spectrum analysis)
Sets precise azimuth, elevation, and skew for your exact coordinates
Replaces faulty LNBs (typically R200–R500) or damaged cables
Uses quad-shield RG6 cable with >90 dB interference rejection
Tidies installation to prevent future weathering issues
Long-term cost benefit:
A properly aligned dish with quality components prevents chronic pixelation during big matches and survives storms that would knock out marginal installations. Paying R800–R1500 once for professional alignment saves repeated service calls and missed viewing.
Sat Digital coverage:
We serve Cape Town CBD, Northern and Southern Suburbs, Atlantic Seaboard, Helderberg, Stellenbosch, Paarl, and surrounding areas. Same-day and Saturday appointments available for residential and commercial clients—from single-home fixes to 32-decoder guesthouse matrices.
Sat Digital services for fixing DStv signal problems in Cape Town & Western Cape
Sat Digital specialises in satellite TV signal restoration across Cape Town and the Western Cape. When DIY troubleshooting hits a wall, we get your picture back. Our team of expert DSTV installers can quickly and professionally resolve DSTV no signal issues, ensuring your viewing is restored without hassle.
Our core services:
New DStv dish installations (including 80cm and 90cm aluminium options)
Dish re-alignment and LNB replacement for E48-32 errors
Signal troubleshooting and repair using professional-grade meters
Decoder upgrades to DStv Explora, HD, and XtraView configurations
Smart LNB installations for multi-room setups
OpenView installations and repairs
TV wall mounting and projector installation
Commercial solutions:
Multi-screen sports bar and restaurant setups
Hotel and guesthouse systems (headend distribution for 8–32+ rooms)
Office waiting room installations
Reliable signal for business-critical viewing
What to expect:
Same-day or next-day appointments in most Cape Town areas
Saturday availability for residential clients
Transparent pricing with quotes before work begins
DStv-accredited installation standards
Serving Cape Town since 2018, Sat Digital has resolved thousands of signal issues—from simple connector replacements to full commercial system overhauls.
Ready to fix signal strength issues for good? Call, WhatsApp, or complete our online form for a free signal assessment quote. Search “DStv installer near me” and you’ll find us serving your area.
Final check: ensuring your DStv signal is restored
Once you’ve completed all troubleshooting steps, it’s important to confirm that your DStv signal is fully restored and your viewing experience is back to normal. Start by scrolling through your channels to ensure that all your usual content is available and playing without interruptions. Check the signal strength and quality readings in your decoder’s menu—these should be within the recommended range for optimal performance.
If you’ve made any adjustments to your satellite dish or replaced the LNB, double-check the alignment and run a signal test to verify that the signal is strong and stable. Look out for any lingering error messages on your screen; if you see any, try resetting your DStv decoder to its factory defaults and re-configuring the settings. This can help clear out any residual software glitches and ensure your decoder is communicating correctly with the satellite.
Remember, if you’re still experiencing signal issues after these final checks, or if you’re unsure about any part of the process, don’t hesitate to reach out to a professional DStv installer. An expert can quickly identify and resolve complex signal problems, ensuring you get the best possible signal strength and uninterrupted access to all your channels. With your DStv signal restored, you can sit back, relax, and enjoy your favourite shows with confidence.
Preventing future DStv signal problems (maintenance tips)
Small, regular checks prevent emergency call-outs—especially in windy and coastal suburbs where equipment degrades faster. Regular maintenance is key to preventing poor reception and common signal issues, ensuring your DSTV system delivers optimal performance.
Quarterly visual inspection:
Every 3–6 months, take a look at your dish:
Has it twisted or tilted since last check?
Are any new obstructions appearing (trees, construction)?
Are cables still neatly fixed and weather-protected?
Any visible rust or corrosion on mounts?
Catching a 0.5° twist early prevents total signal loss during the next storm.
Manage vegetation:
Trim trees and climbing plants before they reach your dish line-of-sight. Common Cape Town garden species like ficus, bougainvillea, and Camphor laurel grow aggressively—some reaching 5 metres per year. A clear line today may be blocked in six months, leading to poor reception.
Protect outdoor connections:
Use proper weather-proof boots on all F-connectors
Avoid cheap plastic joiners that crack and admit water
Replace any visibly degraded connectors before they fail completely
Surge protection:
Western Cape winter storms bring lightning risk. A basic surge protector (MOV-based, clamping at 400V) between your wall socket and decoder prevents the 10% of decoder failures caused by power spikes—especially relevant during load-shedding transitions.
Annual professional check-up:
For complex multi-decoder setups, commercial systems, or installs in harsh coastal locations, an annual service call catches marginal issues before they become outages. Sat Digital offers maintenance packages that keep your DStv and Openview systems stable year-round.
Most DStv signal problems in Cape Town homes come down to a handful of fixable causes—and with the right approach, you can diagnose many yourself. When the job needs professional tools and expertise, Sat Digital is a call away.
Contact Sat Digital today for signal repair, dish installation, or a free assessment. We’ll get your DStv working properly—and keep it that way.