How To Fix LNB On Satellite Dish: A Step-By-Step Guide For DStv
A faulty LNB (Low Noise Block) can be one of the most frustrating issues when watching DStv. If you’re experiencing signal loss, missing channels, or the dreaded E48-32 error, the LNB could be the culprit. Fortunately, there are several steps you can take to fix the issue. This step-by-step guide will help you fix a faulty LNB on DStv.
Repairing an LNB is generally not possible as they are factory-sealed units; if internal components fail, the unit must be replaced.
In this guide, we’ll walk you through easy troubleshooting steps, helping you get your satellite dish back in working order. Sometimes, an upgrade is absolutely necessary—especially if your box (satellite receiver) or LNB is outdated and no longer compatible with current services. LNBs typically need to be replaced rather than repaired due to their complexity and precision. Dish Network may provide a new LNB at no charge, but charges may apply for upgrades or troubleshooting.
Additionally, we’ll answer some frequently asked questions (FAQs) to ensure you have all the information you need.
DStv installations can be performed by both professionals and DIY enthusiasts. When choosing a DStv installer, it is advisable to ask for references and check their reviews online.
For professional DStv installation, repairs, and LNB replacements, contact 071 304 6955 or email for fast and reliable service. Sat Digital provides expert installation and repair services for DStv and OpenView satellite TV systems in Cape Town, serving both residential and commercial clients in the Western Cape.
Let’s get started!
Introduction to LNB Repair
Repairing a dish LNB (Low Noise Blockdown Converter) is a crucial step in restoring your satellite dish system to optimal performance. The LNB is responsible for capturing the satellite signal, amplifying it, and converting it into a format your receiver can process, ensuring you get clear channels and uninterrupted TV reception. When the LNB becomes faulty, you may notice a drop in signal strength, poor reception, or even a complete loss of channels on your TV.
Before you begin any repair or replacement, it’s important to understand how the LNB works within your satellite dish setup. The LNB sits at the focal point of the dish, collecting signals from the satellite and sending them down the cable to your receiver. Common issues with the dish LNB include water ingress, corrosion, physical damage, or simply wear and tear from years of exposure to the elements.
LNBs are typically not repaired but replaced, as changing the LNB is the standard solution when faults occur. When changing or upgrading the LNB, it’s important to do so carefully to avoid misalignment, which can lead to further signal issues.
To fix or replace a faulty LNB, you’ll need some basic equipment: a new LNB (if replacement is necessary), a screwdriver or spanner to unscrew the mounting bracket, and possibly a signal meter to help with alignment. Always ensure your satellite dish and cables are in good condition before starting the repair process. Whether you’re a DIY enthusiast or a professional installer, following the right steps will help you restore your satellite signal and get back to watching your favorite channels without interruption.
If you’re unsure about any part of the repair, or if the problem persists after your efforts, don’t hesitate to contact a professional for expert DStv repairs and advice. With the right approach, you can fix your satellite dish, improve signal strength, and enjoy reliable TV reception once again.
What Is an LNB, and Why Is It Important?
Before diving into fixes, it’s essential to understand what an LNB does. The LNB is the small device attached to the arm of your satellite dish. The LNB is connected to the dish, and a signal line (coaxial cable) runs from the LNB to your receiver, ensuring proper transmission of the satellite signal.
It plays a crucial role in receiving satellite signals and converting them into a format that your decoder can process. The LNB requires 13V/18V power supplied from the receiver to function. The number of outputs on the LNB determines how many receivers or TVs can be connected, so choosing the right number of outputs is important for your setup.
Without a functioning LNB, your DStv decoder won’t receive a strong signal, leading to missing channels or complete service disruption.
Now that we understand the LNB’s role, let’s look at how to identify a faulty one.
Understanding the Satellite Dish System
A reliable DStv experience starts with a well-functioning satellite dish system. This system is made up of several key components that work together to deliver crystal-clear channels to your TV. The process begins with the satellite dish itself, which is carefully aligned to receive signals broadcast from satellites orbiting high above the Earth. The dish acts as a collector, focusing these signals onto the LNB (Low Noise Blockdown Converter) mounted at the end of its arm.
The LNB is crucial—it amplifies the weak satellite signal and converts it to a frequency that your DStv decoder or receiver can process. From there, the signal travels through cable connections to your decoder, which decodes the information and sends it to your TV, allowing you to watch your favorite channels with minimal interruption.
If any part of this chain—be it the dish, LNB, cable, or decoder—has an issue, you may notice problems like weak signal strength, missing channels, or pixelation on your screen. Understanding how these components interact makes it easier to pinpoint where a problem might be occurring, whether it’s a misaligned dish, a faulty LNB, or a loose cable connection. By keeping your satellite dish system in top shape, you’ll enjoy uninterrupted reception and the best possible DStv signal quality.
LNB Types and Frequencies
Choosing the right LNB is essential for getting the best signal strength and channel selection from your DStv service. There are several types of LNBs available, each designed for different needs. The most common options are single, dual, and quad LNBs. A quad LNB, for example, is ideal if you want to connect multiple decoders or watch channels from different satellites at the same time, making it a popular choice for homes with several TVs or commercial setups.
Another important factor is the frequency range your LNB supports. DStv and many other satellite TV providers use the Ku band, which is optimized for high-definition channels and reliable reception. When purchasing a new LNB, always ensure it’s compatible with the Ku band to avoid signal issues and ensure you can access all your subscribed channels.
Proper installation and alignment of your new LNB are just as important as choosing the right model. Secure cable connections, a clean dish free from debris, and correct positioning all help maintain strong signal strength and clear reception. Regularly checking your cables and equipment can help you avoid common problems and keep your DStv service running smoothly. If you’re unsure which LNB is best for your setup or need help with installation, Sat Digital’s expert team is always ready to assist with upgrades, repairs, and advice to ensure you get the most from your satellite TV service.
Signs That Your LNB Might Be Faulty
A bad LNB can cause various signal problems. Here are some common symptoms:
Error Code E48-32 (No Signal) – The decoder cannot receive a proper signal. Intermittent Signal Loss – Channels may appear and disappear randomly. Pixelation or Freezing – Poor picture quality with lagging video. Some Channels Missing – While some work fine, others may not show at all. No Audio or Distorted Sound – A faulty LNB can also impact sound clarity.
Water ingress is the most common cause of LNB failure, so it’s wrong to assume all signal issues are due to other components. Always check the LNB first if you notice these symptoms.
If you’re experiencing any of these issues, don’t worry! You can fix them by following the steps below.
How to Fix a Faulty LNB on DStv (Step-by-Step Guide)
Step 1: Check Your Cable Connections
First and foremost, inspect all your cable connections. A loose or damaged cable can cause signal loss, making it seem like the LNB is faulty when it’s actually a connection problem.
Ensure the coaxial cable is firmly screwed into the LNB and the decoder’s LNB IN port.
Look for any visible damage on the cables, such as cuts or bends.
If the F-connector is corroded, clean it or replace it with a new one.
If your cables are in good condition, move on to the next step.
Step 2: Check the Positioning of Your Satellite Dish
Before making any adjustments, use a marker to mark the current angle and position of the LNB on its bracket. This will help you replicate the previous alignment if needed.
A misaligned satellite dish can weaken or completely block the signal, giving the impression that the LNB is at fault. If strong winds or physical impact have shifted your dish, realigning it may fix the issue.
Carefully adjust the dish angle while monitoring the signal strength on your DStv decoder. Go to Menu → Settings → Satellite Settings → Signal Strength to check the quality. The rotation of the LNB in its bracket is critical for optimal signal reception. For many Southern African locations, the skew position is around the 4 o’clock position when looking at the dish from the front. If the signal improves when adjusting the dish, secure it in the best position.
The LNB must be rotated to match the signal polarization, usually measured in degrees or by a ‘clock’ position, to ensure your dish receives the best signal from the sky.
Still no luck? Move on to step three.
Step 3: Inspect the LNB for Physical Damage
Since the LNB is exposed to the elements, it may develop cracks, water damage, or corrosion over time. This is especially true if it has been in use for several years.
Carefully collect (remove) the LNB from the dish for inspection, making sure not to damage the alignment or the dish itself.
Look for visible cracks or broken parts on the LNB casing. Check for rust or corrosion on the metal connectors. If you notice moisture inside the LNB, it is likely damaged beyond repair.
If the LNB appears damaged, replacing it is your best option.
Step 4: Perform a Soft Reset on Your DStv Decoder
Sometimes, your decoder may simply need a reset to restore proper signal reception.
Switch off your DStv decoder and unplug it from the power source.
Wait for at least 5 minutes before turning it back on.
Check if the signal strength has improved once the decoder restarts.
If the problem persists, replacing the LNB is the next step.
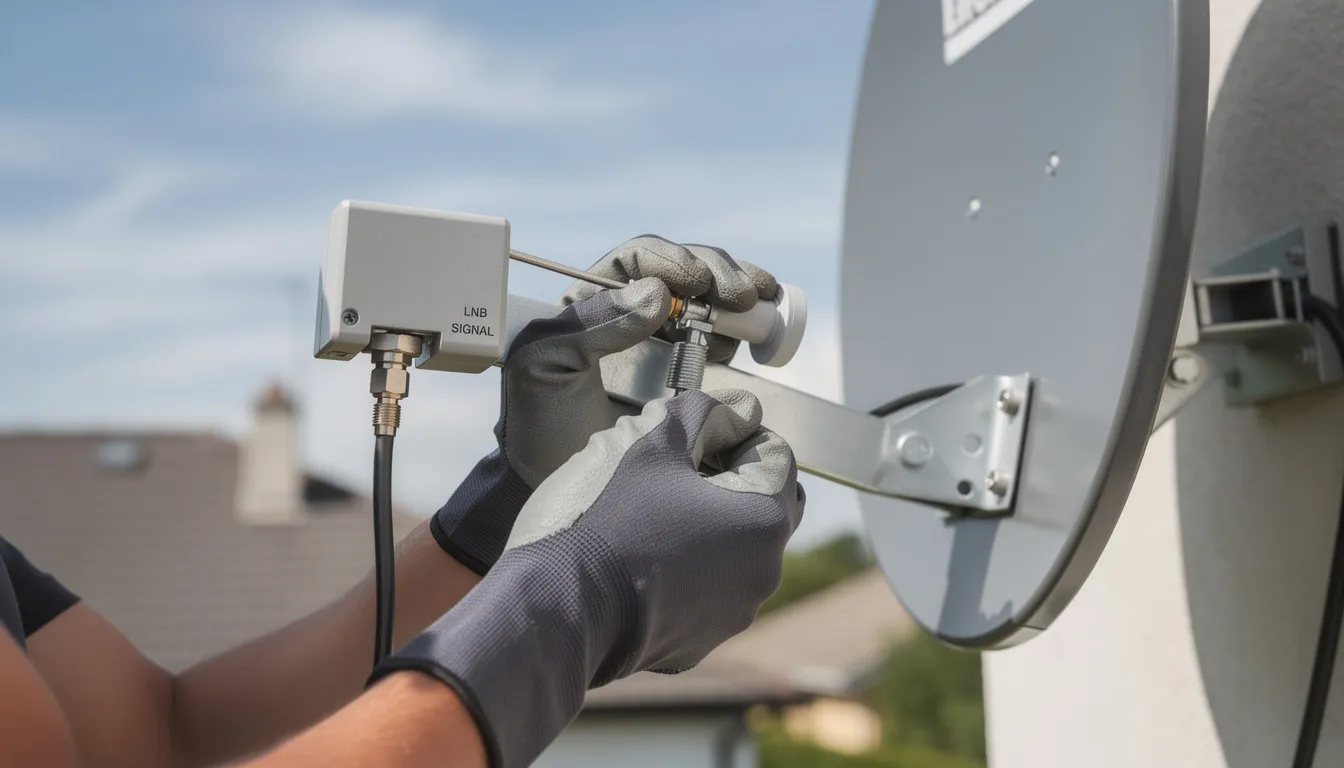
Step 5: Replace the Faulty LNB
If you’ve tried all the above steps and still have signal problems, it’s likely that your LNB is defective. Fortunately, replacing an LNB is a straightforward process. To replace an LNB, you must unscrew the mounting bracket and disconnect the cables before installing the new unit. You can purchase a new LNB from accredited dealers if you choose to replace it yourself. It is advisable to buy a quad LNB instead of a dual LNB for future-proofing your satellite system. Replacing a faulty LNB can often resolve persistent DStv signal issues. In some cases, you may need to swap out your old LNB or even install a new dish if the existing one is damaged.
How to Replace an LNB:
Turn off your decoder and unplug the coaxial cable from the LNB.
Unscrew the old LNB from the satellite dish arm.
Attach the new LNB securely in place.
Reconnect the coaxial cable and tighten it properly.
Turn your decoder back on and check the signal strength.
If the signal has improved, congratulations—you’ve successfully fixed the issue! However, if you’re still experiencing problems, consider contacting a professional DStv installer for assistance.
Final Check: Testing Your Satellite Signal After Repair
Once you’ve repaired or replaced your LNB, it’s essential to verify that your satellite signal is strong and stable. This final check ensures that your dish, new LNB, and cable connections are all working together to deliver the best possible reception to your TV.
Start by connecting your receiver to the new LNB and powering it on. Use a signal meter to measure both the signal strength and quality—this device is invaluable for pinpointing any lingering issues with alignment or cable integrity. Check the signal readings for each channel to confirm they fall within the recommended range for your satellite service.
If you notice weak or fluctuating signal strength, adjust the dish alignment and elevation carefully, making small changes and monitoring the results on your signal meter. Double-check all cable connections between the dish, LNB, and receiver to ensure they are secure and free from damage. Even a slightly loose or corroded cable can impact your signal quality.
After making any adjustments, test the signal strength and quality again to confirm that your reception is stable and all channels are available. Refer to your receiver’s user manual for specific instructions on accessing signal test menus and making fine-tuned adjustments.
By following these steps, you can be confident that your satellite dish system is delivering optimal performance. A thorough final check helps you avoid future interruptions and ensures you get the most out of your DStv or satellite TV service. Enjoy crystal-clear channels and reliable TV viewing, knowing your equipment is set up for the best possible signal.
FAQs About Fixing a Faulty LNB on DStv
1. How can I tell if my LNB is faulty?
A faulty LNB will cause signal loss, missing channels, or distorted picture quality. The easiest way to confirm is to replace it with a working LNB and check if the signal improves.
2. Can I fix a faulty LNB without replacing it?
It depends on the issue. If the problem is caused by loose connections or dish misalignment, you can fix it without replacing the LNB. However, if the LNB is damaged or corroded, replacement is the best solution.
3. How much does it cost to replace a DStv LNB?
A new LNB costs between R150 and R500, depending on the type and quality. If you hire a professional installer, expect to pay between R500 and R1000, including installation.
4. Can bad weather affect my LNB?
Yes! Heavy rain, strong winds, and extreme heat can cause an LNB to deteriorate over time. If you frequently experience signal loss during bad weather, your LNB may need replacement.
5. Where can I find a reliable DStv installer near me?
If you’re struggling with LNB issues, it’s best to consult a professional DStv installer Sat Digital offers expert DStv services, including LNB replacement and dish realignment.
Final Thoughts
Fixing a faulty LNB on DStv doesn’t have to be complicated. By following these steps, you can diagnose the problem, troubleshoot effectively, and restore your satellite signal.
To recap:
Start by checking cable connections and dish alignment.
Inspect the LNB for physical damage or corrosion.
Try a decoder reset before replacing the LNB.
If all else fails, install a new LNB or seek professional help.
For expert DStv installation, repairs, and LNB replacements, check out our Services or contact 071 304 6955 for professional assistance.
For fast, reliable assistance, contact Sat Digital for expert DStv installations and repairs.
Enjoy uninterrupted entertainment with a strong and stable DStv signal!
For official DStv updates, self-service, and account management, visit DStv.
For the latest news, products, and services from the official DStv provider, visit MultiChoice.